Installation rapide
Cette page explique comment mettre en place une architecture Mugnsoft autonome en utilisant un seul serveur hote :
1 webserver, 1 sonde (monitor) et 1 integrator.
Cela devrait prendre moins de 5 min.
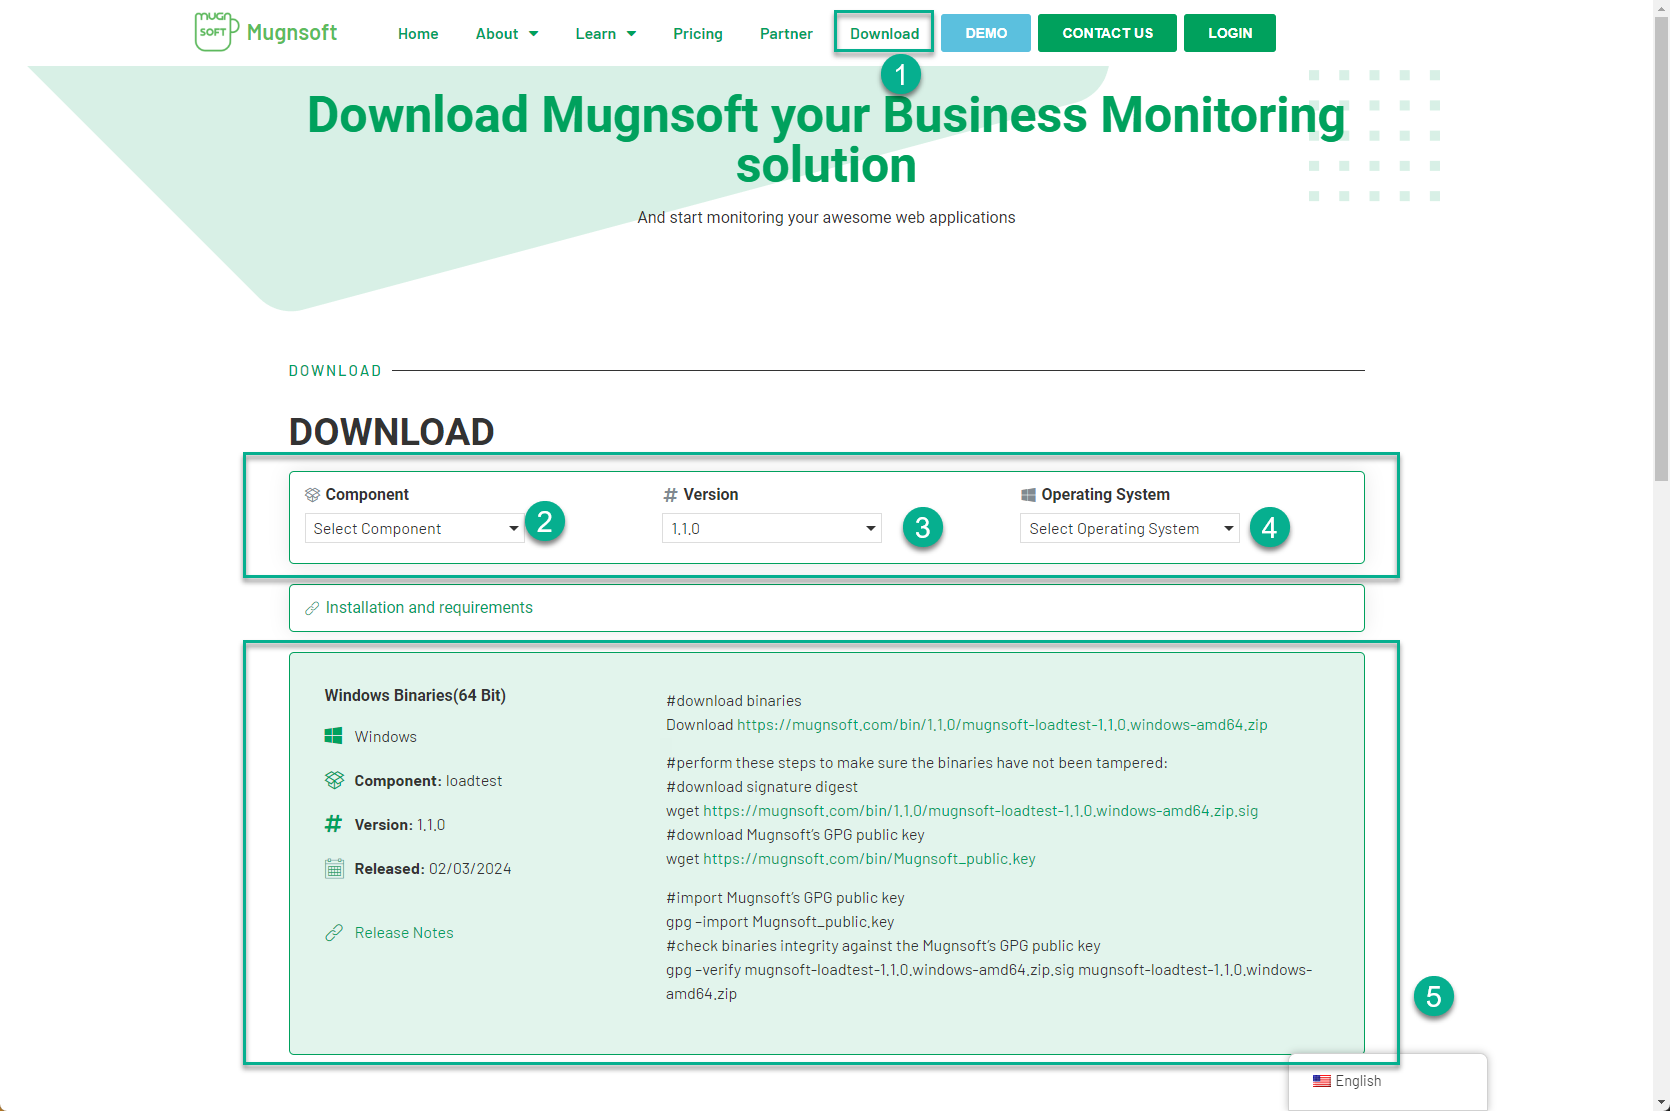
Pour telecharger le fichier (.zip) pour Windows ou (.tgz) pour Linux, rendez-vous sur cette page web : https://mugnsoft.com/download/.
A partir de la, selectionnez le composant, la version et le systeme d’exploitation de votre choix.
Note :
Si vous souhaitez deployer sur une architecture distribuee, mettez a jour l’adresse IP et le numero de port en consequence.
Si vous avez besoin d’un deploiement Docker, contactez-nous. Nous serons heureux de partager avec vous notre fichier docker-compose.
Si vous n’avez pas le temps : installation avec les parametres par defaut
webserver
# download the zip file, unzip it and cd into it
unzip mugnsoft-webserver-<version>.windows-amd64.zip && cd webserver

# get a license file and copy it as "license_MNS.dat" (do not rename it) in the webserver and integrator installation root directory

# proceed with the installation as a Windows service, open a DOS cmd:
webserver.exe install && webserver.exe start
sonde (monitor)
# download the zip file, unzip it and cd into it
unzip mugnsoft-monitor-<version>.windows-amd64.zip && cd monitor

# proceed with the installation as a Windows service and start the service, open a DOS prompt. During this step, the probe will automatically self-register to the web server API endpoint and pre-register its certificate.
monitor.exe install && monitor.exe start
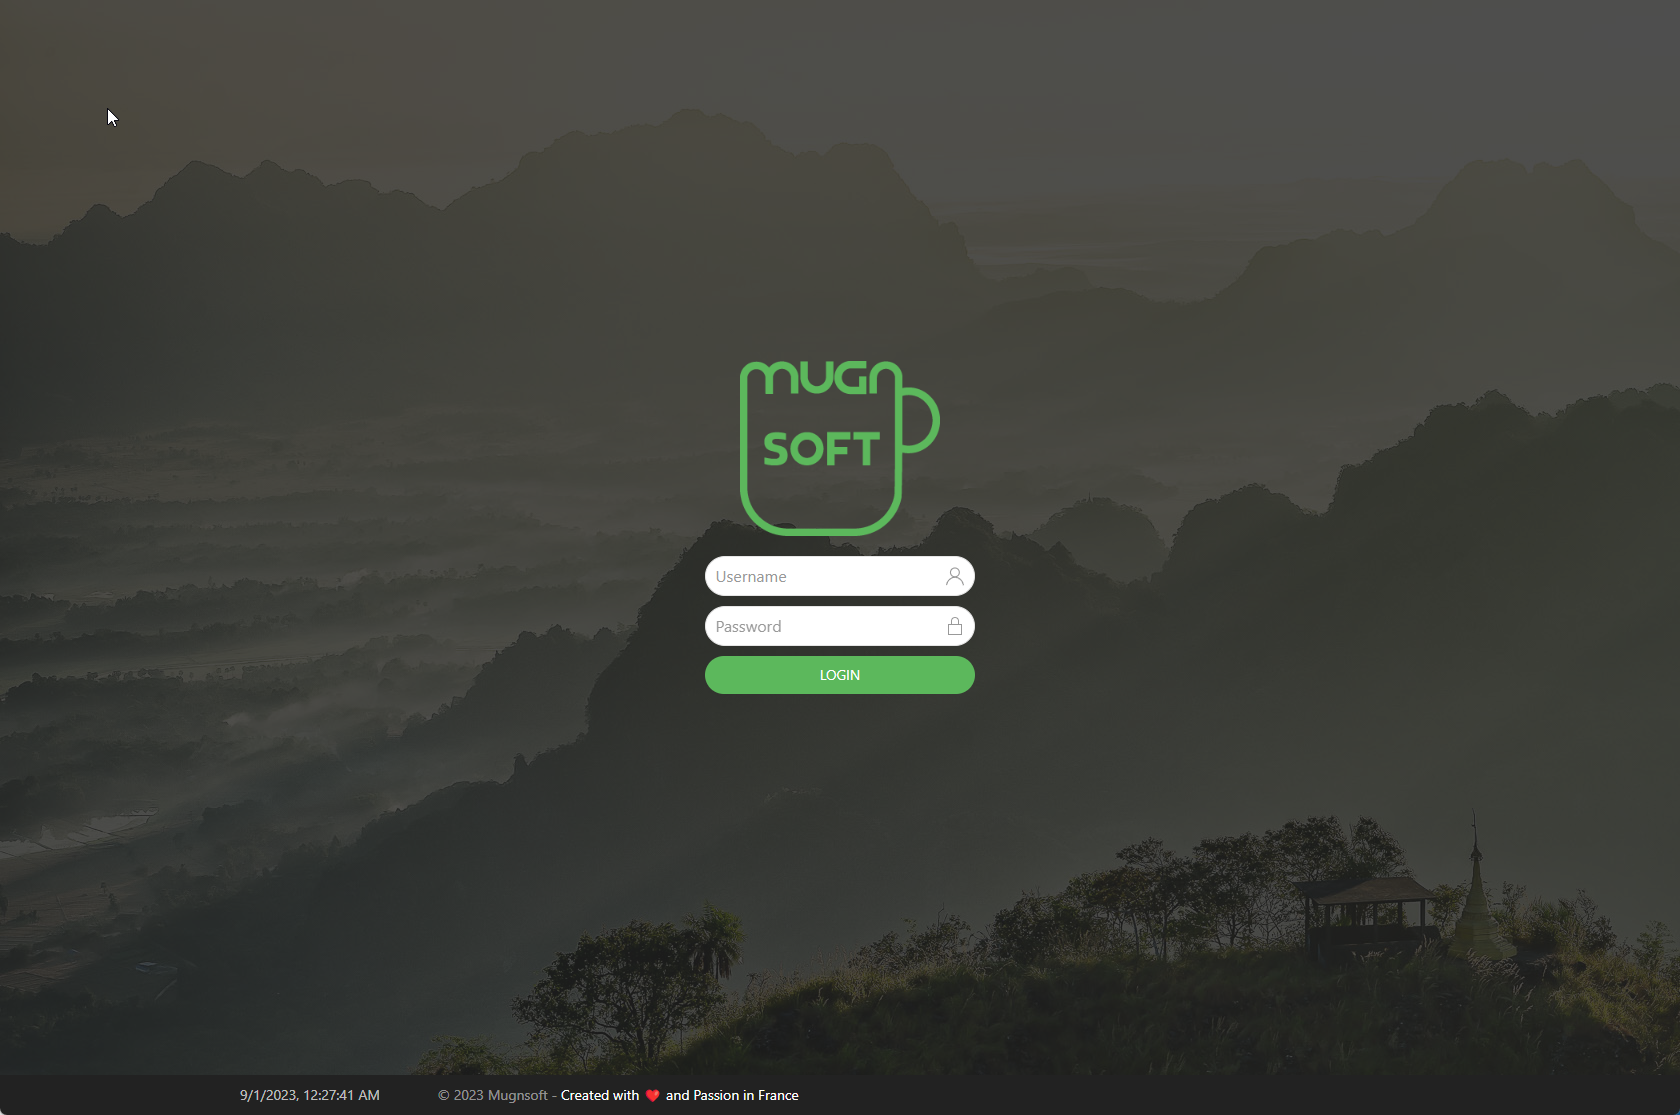
Ouvrez un navigateur a l’adresse https://localhost:9090/ et connectez-vous avec l’utilisateur par defaut ‘admin’ et le mot de passe par defaut ‘admin’.
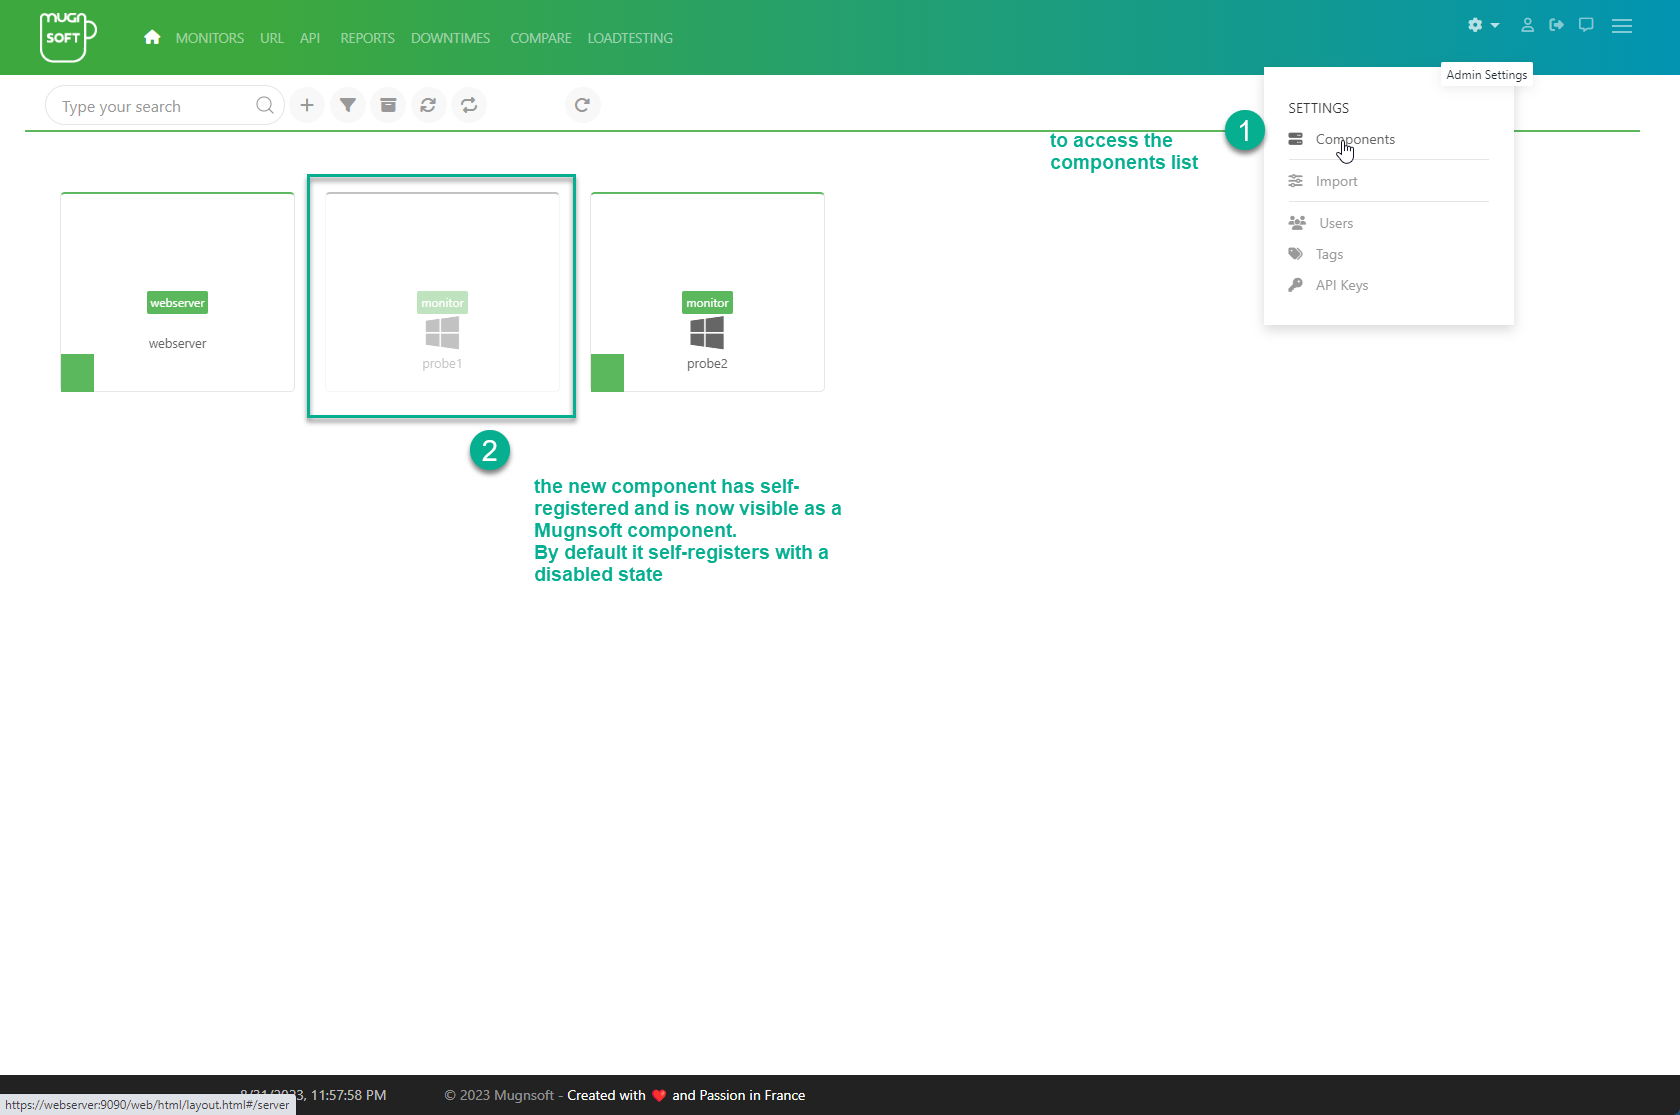
Une fois connecte, activez le composant sonde.
Rendez-vous sur la page web des composants :
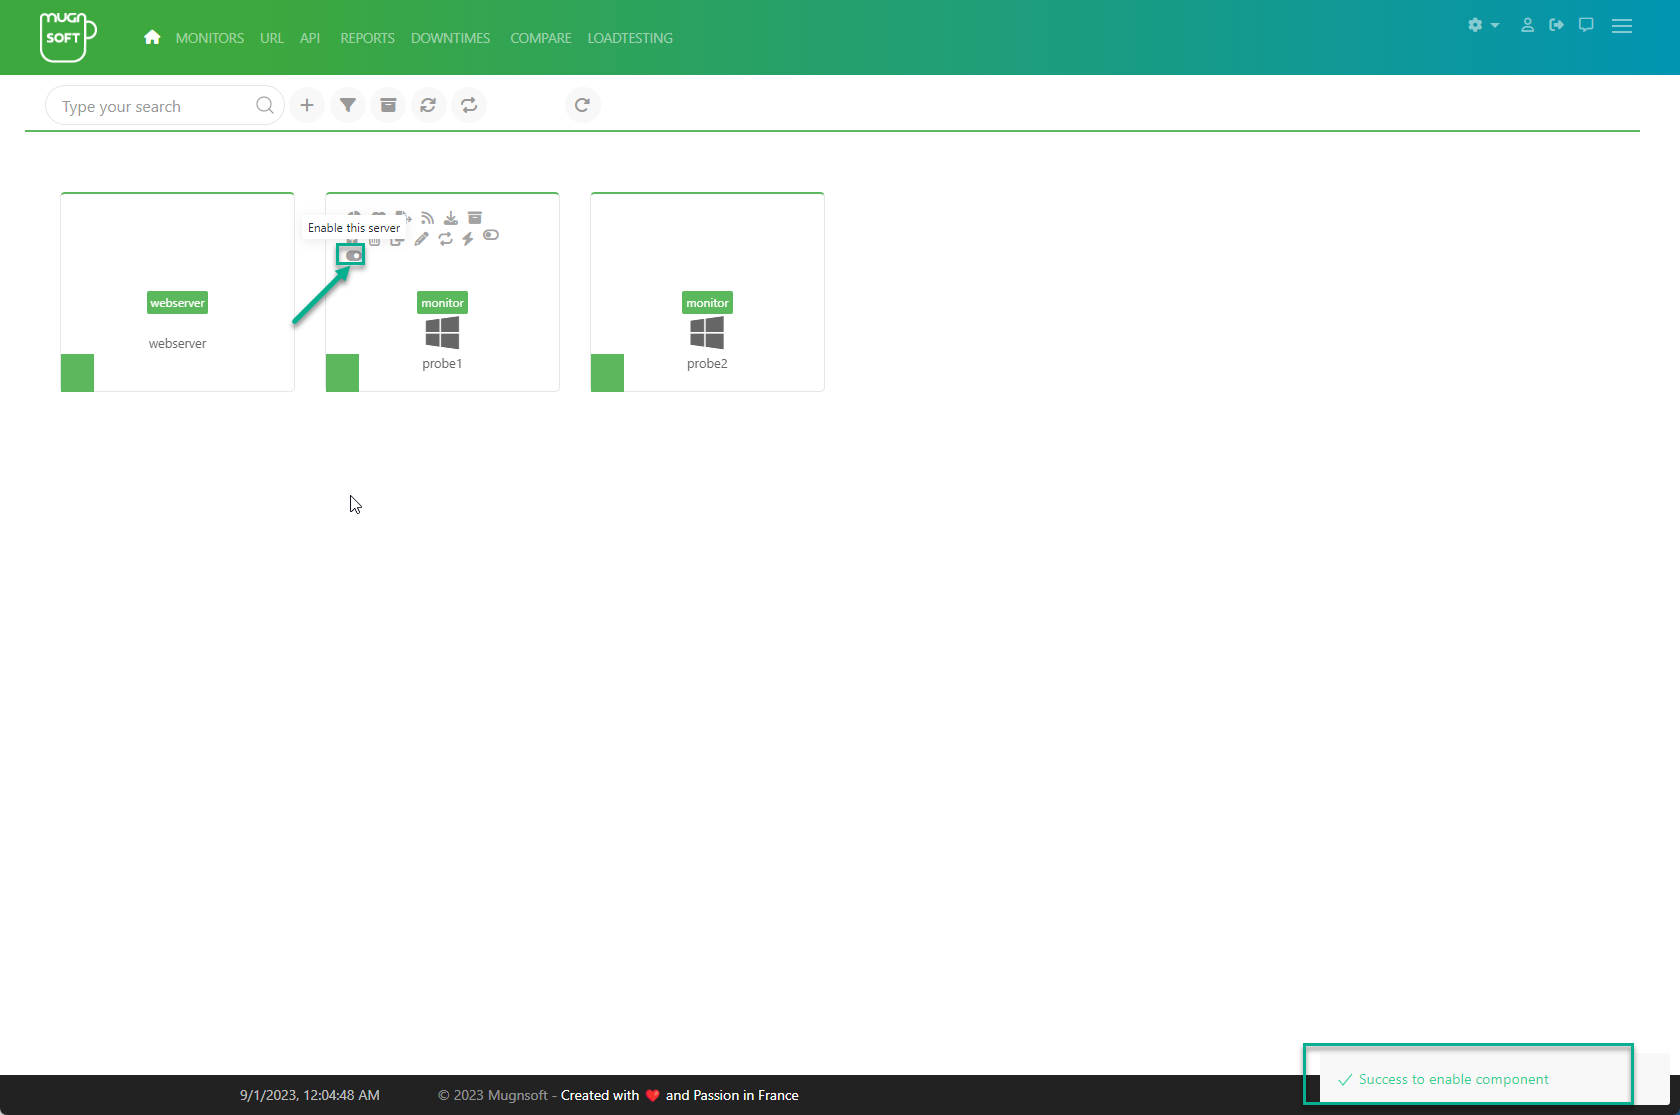
Activez le composant via la page des composants du Webserver. Cliquez sur le bouton “enable” :
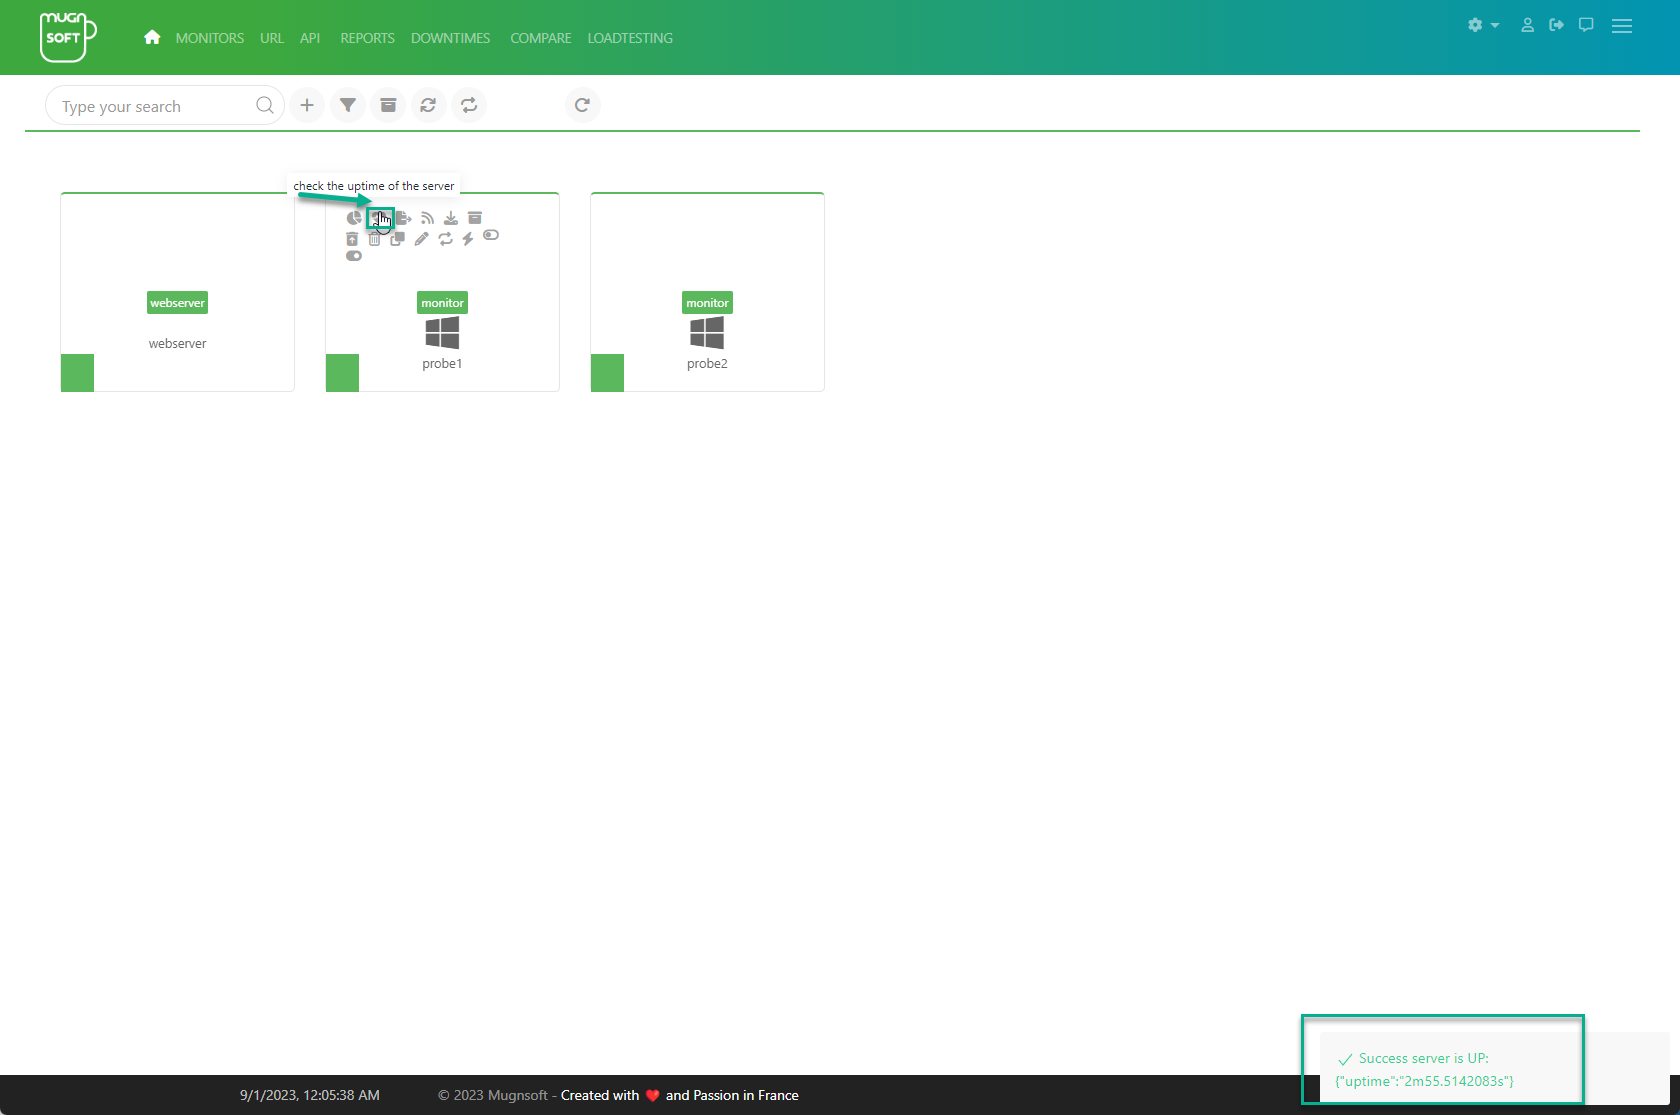
Verifiez que la connexion entre le webserver et le monitor fonctionne correctement en verifiant son uptime :
integrator
# download the zip file, unzip it and cd into it
unzip mugnsoft-integrator-<version>.windows-amd64.zip && cd integrator

# get the license file and copy it as "license_MNS.dat" (do not rename it) in the installation root directory

# proceed with the installation as a Windows service and start the service, open a DOS prompt. During this step, the integrator will automatically self-register to the web server API endpoint and pre-register its certificate.
integrator.exe install && integrator.exe start
Rendez-vous sur la page web des composants :
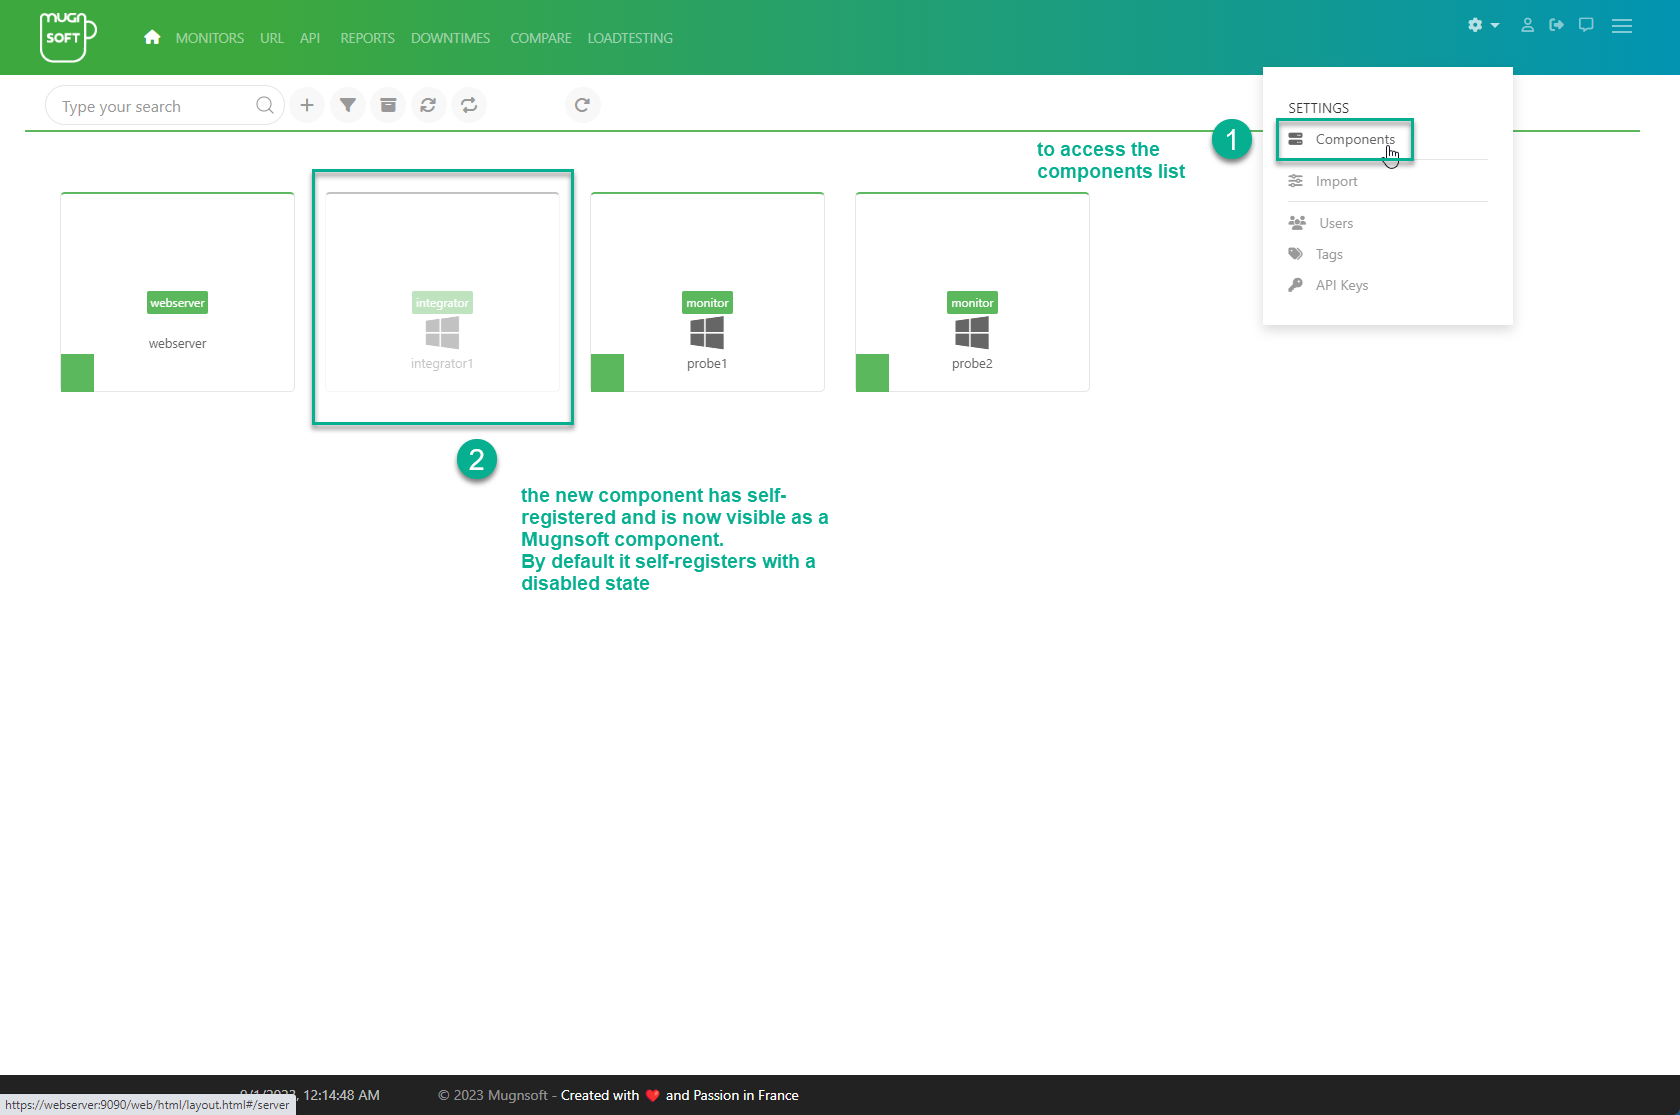
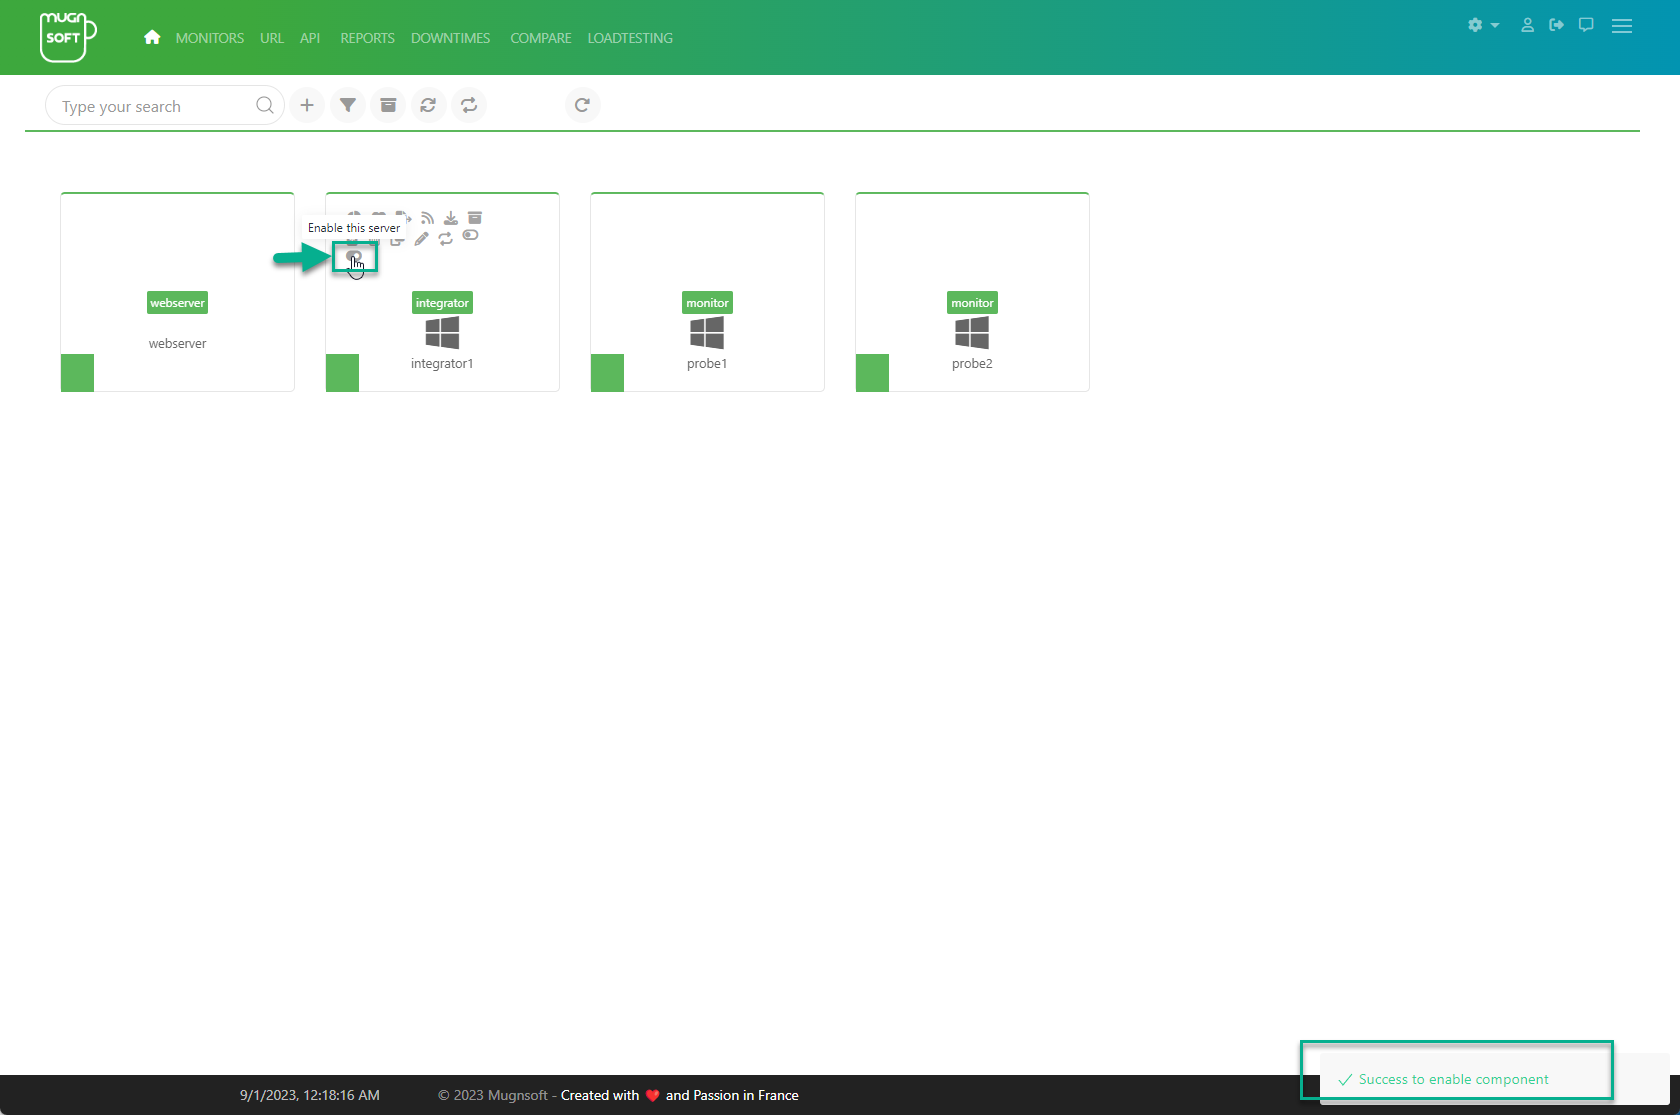
Activez le composant via la page des composants du Webserver. Cliquez sur le bouton “enable” :
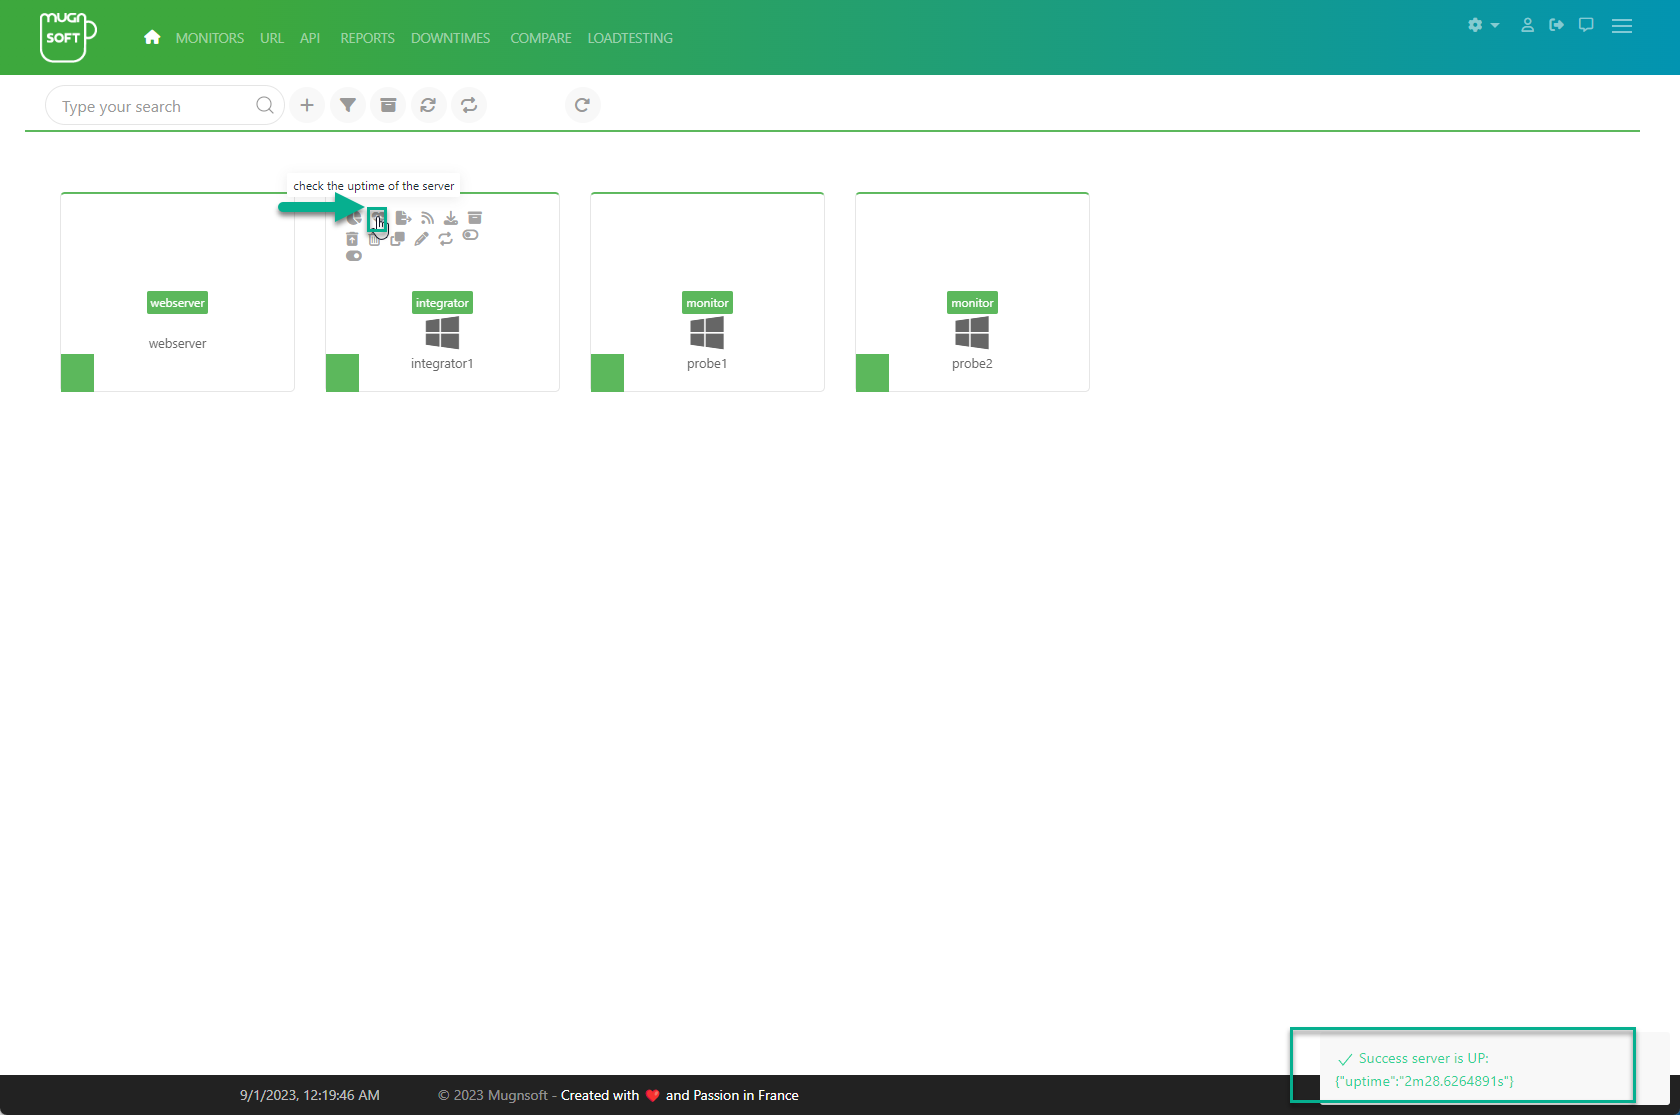
Verifiez que la connexion entre le webserver et l’integrator fonctionne correctement en verifiant son uptime :
Si vous avez le temps : etapes detaillees
Configurer et installer le Webserver Mugnsoft depuis un fichier .zip sur Windows (applicable egalement pour Linux)
# download the zip file by specifying the version you want from:
https://mugnsoft.com/bin/<version>/mugnsoft-webserver-<version>.windows-amd64.zip

# unzip the downloaded file and cd into it
unzip mugnsoft-webserver-<version>.windows-amd64.zip && cd webserver

# get a license file and copy it as "license_MNS.dat" (do not rename it) in the installation root directory
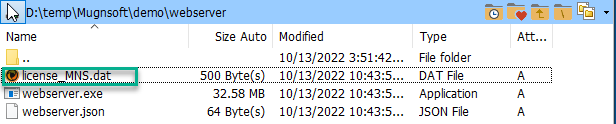
# (optional) update the API and WEB port in the webserver.json file (to optionnally change the port number)
notepad webserver.json

{
	"HTTPS": "true",
	"PortAPI": "8050",
	"PortWEB": "9090"
}

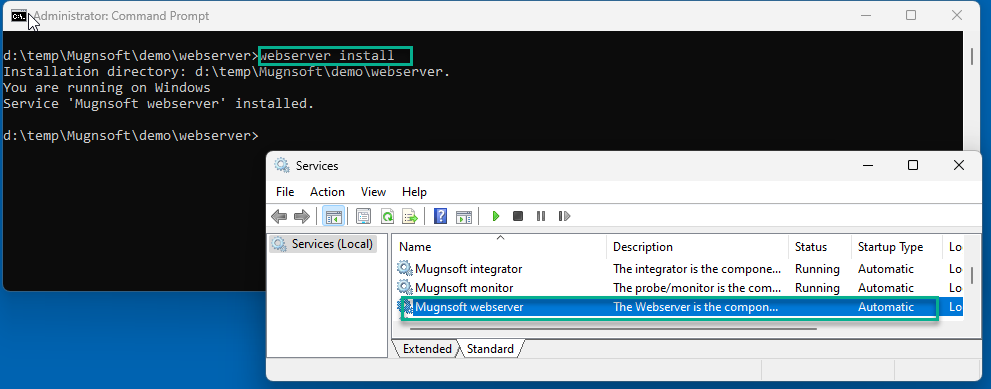
# proceed with the installation as a Windows service, open a DOS cmd:
webserver.exe install
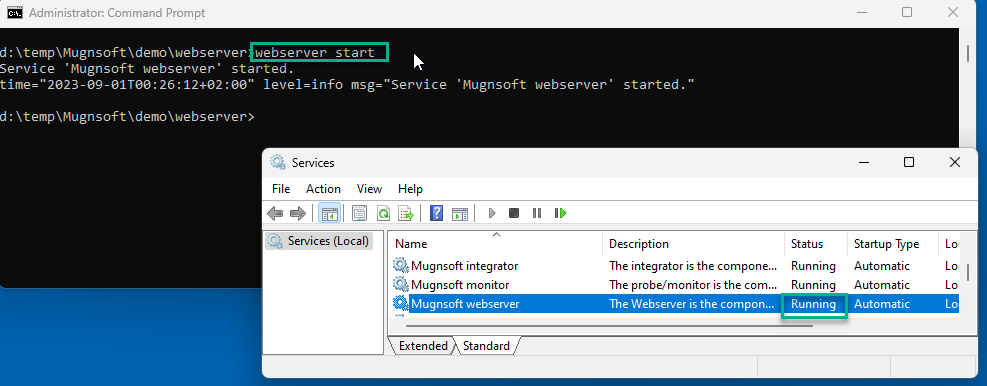
# start the service, open a DOS cmd:
webserver.exe start
Note :
A ce stade, le service devrait etre en cours d’execution.
Vous pouvez maintenant vous connecter au serveur web du webserver : ouvrez votre navigateur et rendez-vous sur (https://localhost:9090/ ou 9090 est le port defini dans votre fichier webserver.json). L’utilisateur administrateur par defaut est ‘admin’ avec le mot de passe ‘admin’.
Configurer et installer le Monitor Mugnsoft depuis un fichier .zip sur Windows (applicable egalement pour Linux)
Maintenant que les prerequis sont remplis, nous pouvons proceder a la meme installation que pour les autres composants.
# download the zip file by specifying the version you want from:
https://mugnsoft.com/bin/<version>/mugnsoft-monitor-<version>.windows-amd64.zip

# unzip the downloaded file and cd into it
unzip mugnsoft-monitor-<version>.windows-amd64.zip && cd monitor

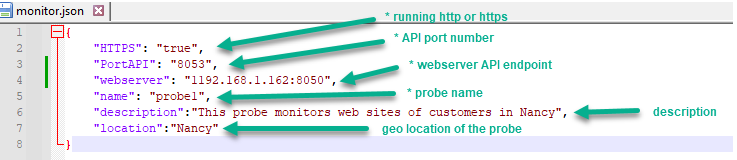
# update the API and WEB port in the monitor.json file
notepad monitor.json

{
	"HTTPS": "true",
	"PortAPI": "8051",
	"webserver": "<webserver_ip>:8050",
	"name": "probe1",
	"description":"This probe monitors web sites of customers in Nancy",
	"location":"Nancy"
}

=> here, just replace the <webserver_ip>
# proceed with the installation as a Windows service and start the service, open a DOS cmd:
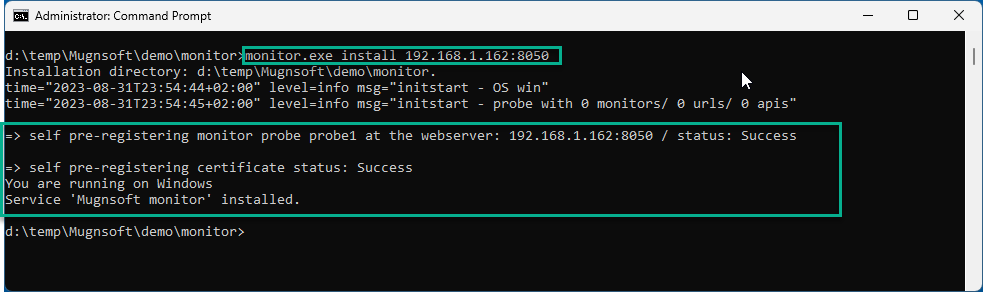
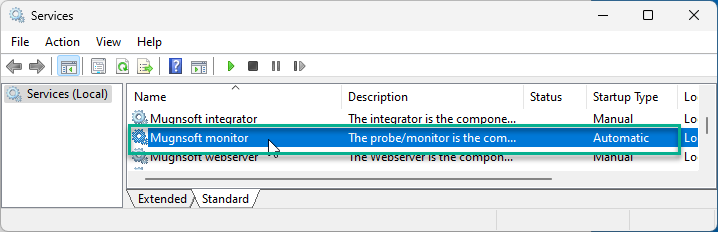
monitor.exe install

Note: install without argument will use the default webserver api endpoint given in the monitor.json file
-
Le monitor s'enregistrera automatiquement sur le webserver.
-
Un certificat auto-signe sera mis en place entre le monitor et le webserver, pour permettre une communication securisee entre eux.
# proceed with the installation as a Windows service and start the service, open a DOS cmd:
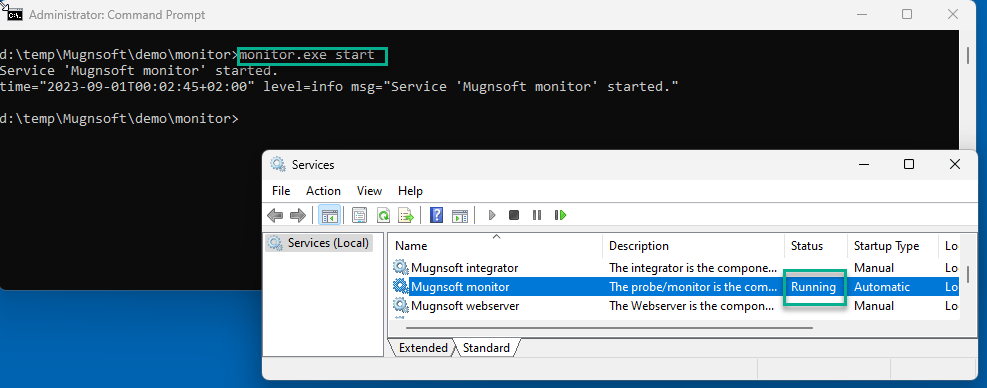
monitor.exe start

Note: install without argument will use the default webserver api endpoint given in the monitor.json file
Activez le composant via la page des composants du Webserver. Cliquez sur le bouton “enable” :
Verifiez que la connexion entre le webserver et le monitor fonctionne correctement en verifiant son uptime :
Note :
Configurer et installer l’Integrator Mugnsoft depuis un fichier .zip sur Windows (applicable egalement pour Linux)
# download the zip file by specifying the version you want from:
https://mugnsoft.com/bin/<version>/mugnsoft-integrator-<version>.windows-amd64.zip

# unzip the downloaded file and cd into it
unzip mugnsoft-integrator-<version>.windows-amd64.zip && cd integrator

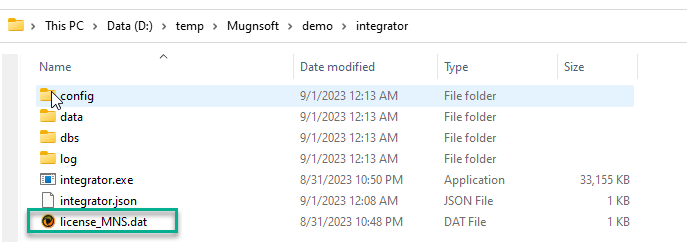
# get the license file and copy it as "license_MNS.dat" (do not rename it) in the installation root directory
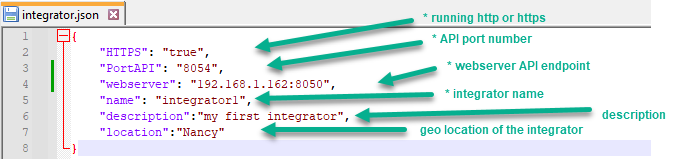
# open the integrator.json file
notepad integrator.json

{
	"HTTPS": "true",
	"port": "8052",
	"webserver": "<webserver_ip>:8050",
	"name": "integrator1",
	"description":"my first integrator",
	"location":"Paris"
}

=> here, just replace the <webserver_ip>
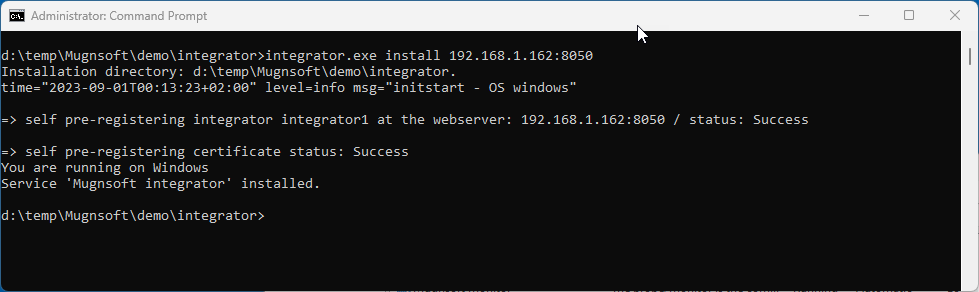
# proceed with the installation as a Windows service, open a DOS cmd:
integrator.exe install
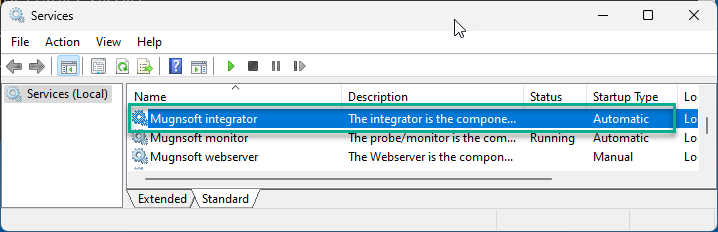
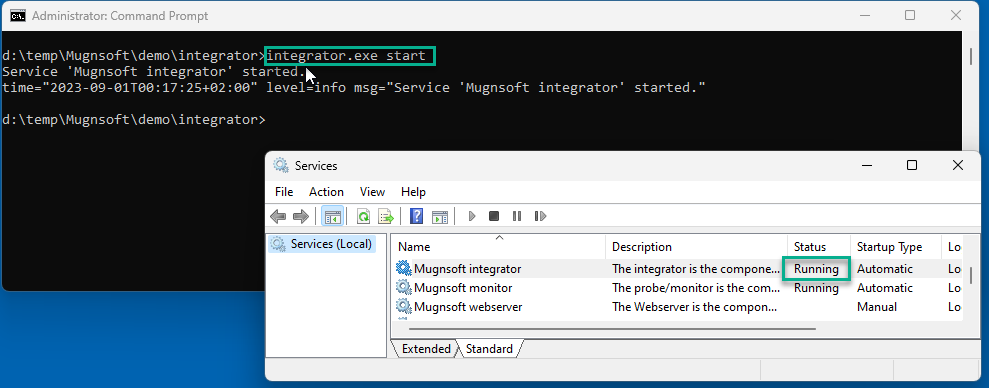
# proceed with the installation as a Windows service and start the service, open a DOS cmd:
integrator.exe start

Note: install without argument will use the default webserver api endpoint given in the integrator.json file
Activez le composant via la page des composants du Webserver. Cliquez sur le bouton “enable” :
Verifiez que la connexion entre le webserver et l’integrator fonctionne correctement en verifiant son uptime :