Integration with InfluxDBv1.x
For this integration we will use InfluxDB’s HTTP/HTTPS EndPoint.
We need to first configure InfluxDB to receive json data from Mugnsoft integrator. The InfluxDB’s endpoint authentification is optionnal, so is the user creation. Then we will define a Mugnsoft integrator component that will forward data of monitors to the defined InfluxDB instance.
Note:
Please for more details refer to https://docs.influxdata.com/influxdb/v1.7/administration/authentication_and_authorization/#authorization
We assume that there is no firewall rule preventing Mugnsoft integrator to communicate with InfluxDB HTTP/HTTPS EndPoint. We assume that you have the right credentials to perform InfluxDB HTTP/HTTPS EndPoint configuration.
Configure Mugnsoft’s integration with InfluxDBv1.x
Create a influxDB user (optional)
$ influx -ssl -unsafeSsl
Connected to https://localhost:8086 version 1.7.9
InfluxDB shell version: 1.7.9
> create user Mugnsoft_user with password 'secret' with all privileges;
> show users
user          admin
----          -----
Mugnsoft_user true
> show databases;
name: databases
name
----
_internal
>
Note:
Enable InfluxDB http endpoint with user authentification (optional)
To enable http with user authentification by updating influxDB config file influxdb.conf:
[http]
  auth-enabled = true
Note:
This step is optional you can leave the default setting false. This means that you can connect to the InfluxDB endpoint without user and password.
Restart your influxDB instance.
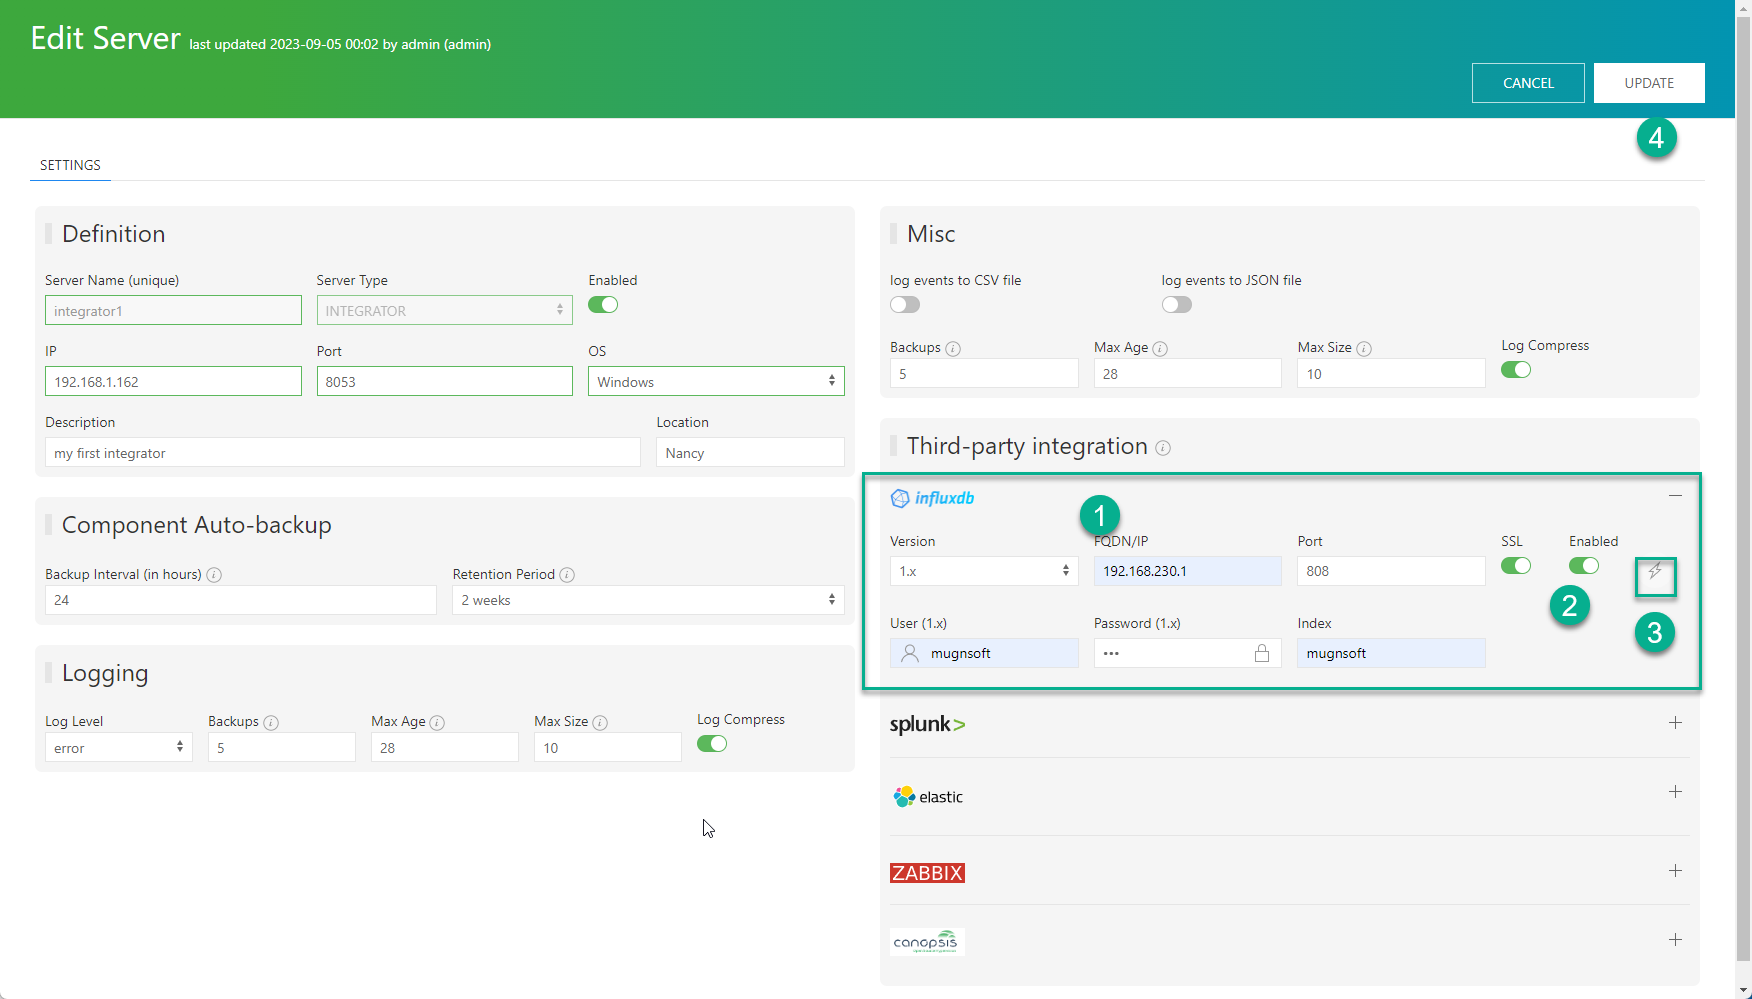
Add/Update the Mugnsoft integrator with InfluxDB info
Update or add a Mugnsoft integrator component with InfluxDB info. Do not forget to check the Enabled box.
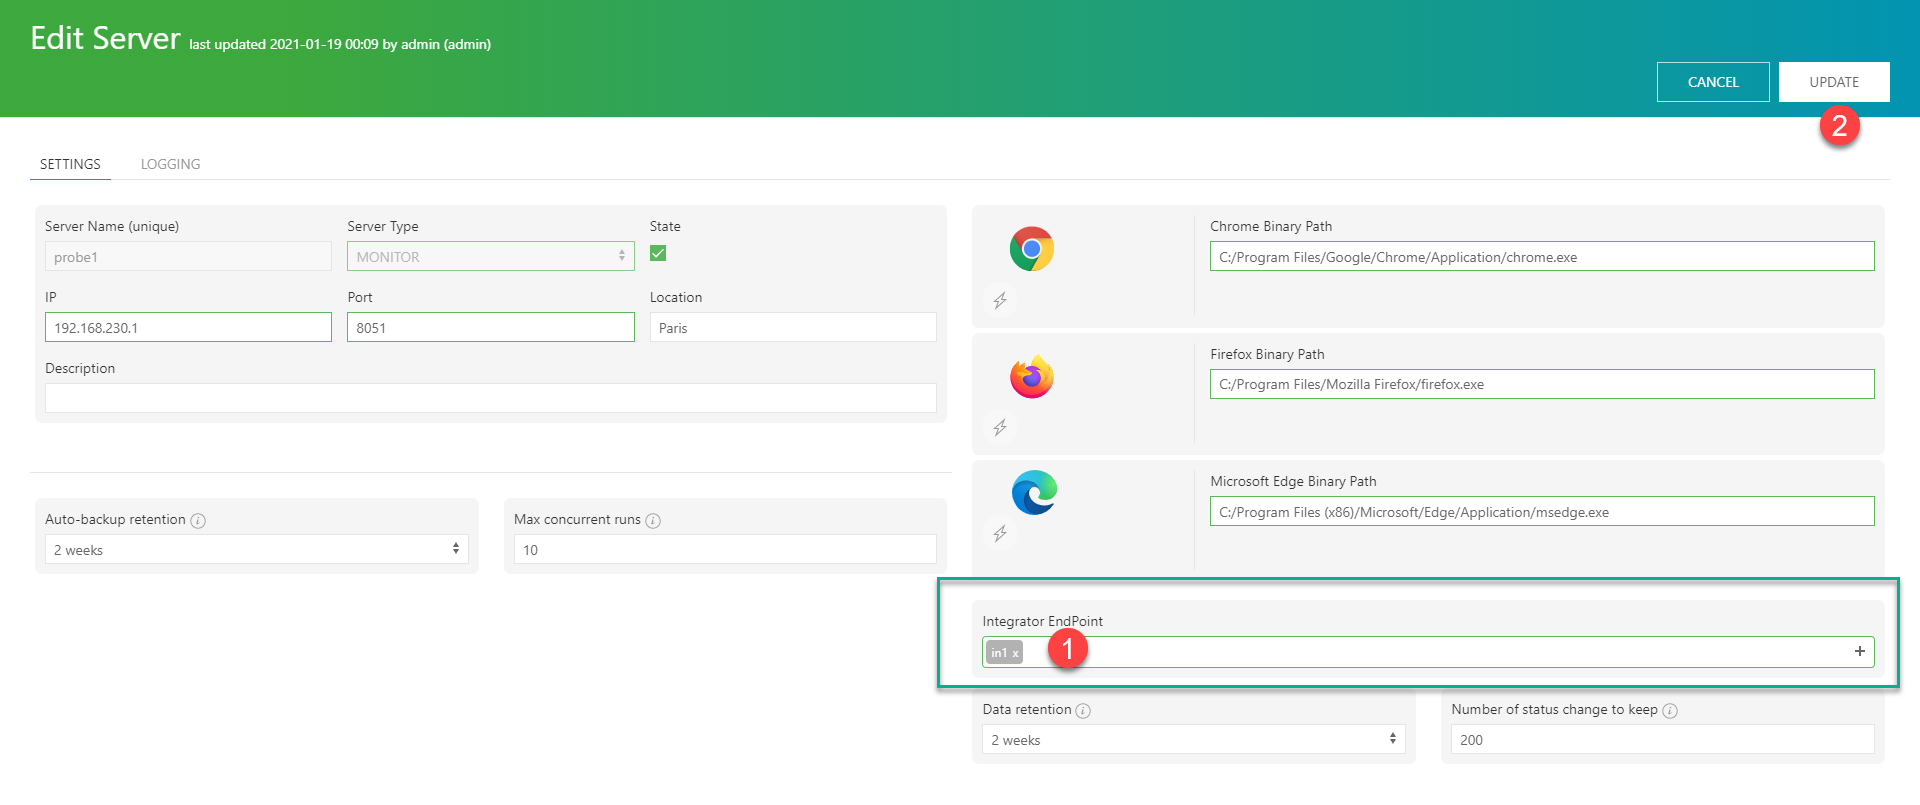
relate the Mugnsoft integrator to its monitor (if not already done)
Attached this integrator component to a selected Mugnsoft monitor component.
Check your InfluxDB’s Search & Reporting dashboard
You should see a database called Mugnsoft in InfluxDB.
> show databases
name: databases
name
----
_internal
Mugnsoft
Check you InfluxDB database “Mugnsoft”
You will start receiving some events in InfluxDB.
> use Mugnsoft
> show measurements
name: measurements
name
----
ScenarioResponseTime
ScenarioTransResponseTime
> show series
key
---
ScenarioResponseTime,location=Paris,name=indeed2_probe1,status=OK
ScenarioResponseTime,location=Paris,name=indeed3_probe1,status=OK
ScenarioResponseTime,location=onDemand,name=my_awesome_website_probe1,status=OK
ScenarioResponseTime,location=onDemand,name=indeed3_probe1,status=OK
ScenarioTransResponseTime,location=Paris,name=my_awesome_website_probe1,status=OK,transactionName=1.\ go-url
ScenarioTransResponseTime,location=Paris,name=my_awesome_website_probe1,status=OK,transactionName=2.\ fetch-profile
ScenarioTransResponseTime,location=Paris,name=my_awesome_website_probe1,status=OK,transactionName=3.\ fetch-data
ScenarioTransResponseTime,location=Paris,name=my_awesome_website_probe1,status=OK,transactionName=4.\ log-out
ScenarioTransResponseTime,location=Paris,name=indeed2_probe1,status=OK,transactionName=1.\ go-url
ScenarioTransResponseTime,location=Paris,name=indeed2_probe1,status=OK,transactionName=2.\ input-what
ScenarioTransResponseTime,location=Paris,name=indeed2_probe1,status=OK,transactionName=3.\ input-where
ScenarioTransResponseTime,location=Paris,name=indeed2_probe1,status=OK,transactionName=4.\ button
ScenarioTransResponseTime,location=Paris,name=indeed3_probe1,status=OK,transactionName=1.\ go-url
ScenarioTransResponseTime,location=Paris,name=indeed3_probe1,status=OK,transactionName=2.\ input-what
ScenarioTransResponseTime,location=Paris,name=indeed3_probe1,status=OK,transactionName=3.\ input-where
ScenarioTransResponseTime,location=Paris,name=indeed3_probe1,status=OK,transactionName=4.\ button
Disable the Mugnsoft/InfluxDB integration
If you want to stop sending the monitors’ data to InfluxDB. Edit the integrator component and uncheck the “Enabled” checkbox.