Quick install
This page explains how to set up a standalone Mugnsoft architecture using a single host server:
1 webserver, 1 probe (monitor) and 1 integrator.
It should take less than 5 min.
To download the (.zip) for Windows or (.tgz) for Linux, go to this web page : https://mugnsoft.com/download/.
From there select the component, version and OS of you choice.
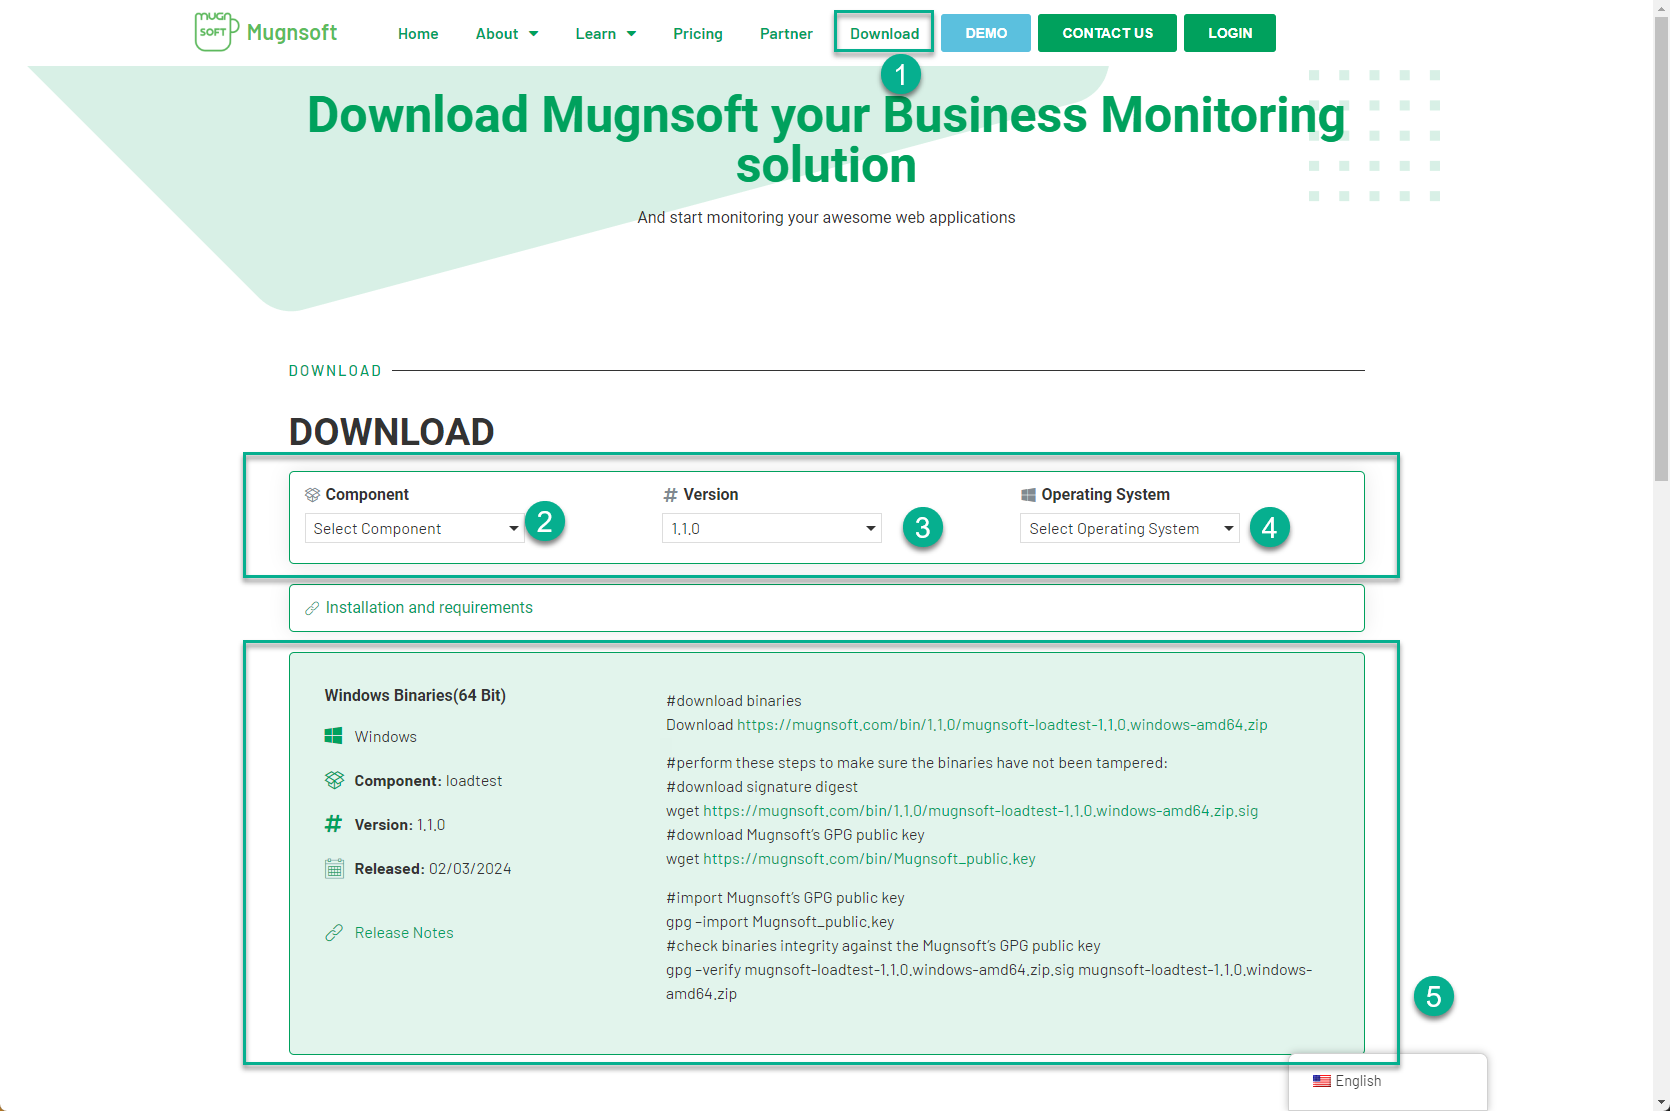
Note:
If you want to deploy across a distributed architecture, update the IP and port number accordingly.
If you need a docker deployment, get in touch with us. We’ll be happy to share with you our docker-compose file
If you have no time: install using default settings
webserver
# download the zip file, unzip it and cd into it
unzip mugnsoft-webserver-<version>.windows-amd64.zip && cd webserver
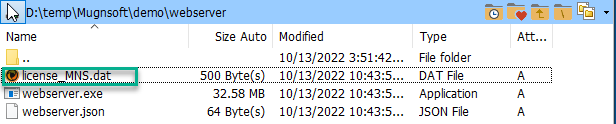
# get a license file and copy it as "license_MNS.dat" (do not rename it) in the webserver and integrator installation root directory
# proceed with the installation as a Windows service, open a DOS cmd:
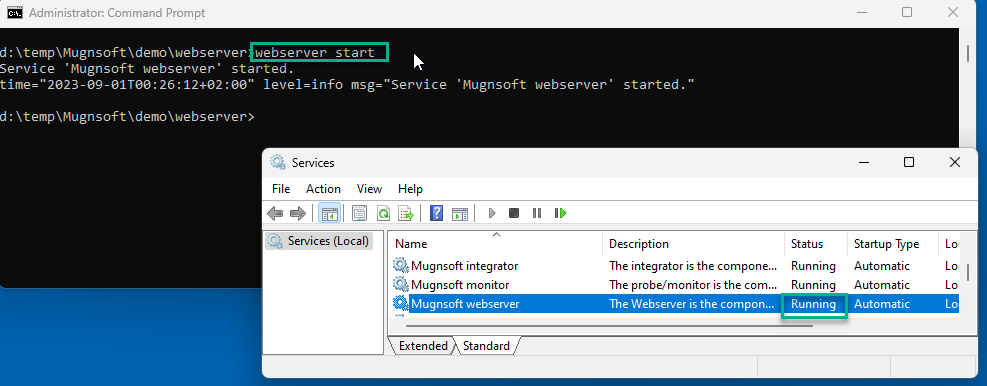
webserver.exe install && webserver.exe start
probe (monitor)
# download the zip file, unzip it and cd into it
unzip mugnsoft-monitor-<version>.windows-amd64.zip && cd monitor
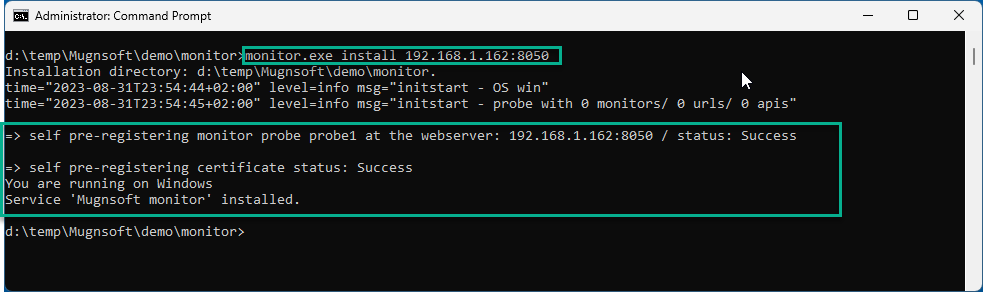
# proceed with the installation as a Windows service and start the service, open a DOS prompt. During this step, the probe will automatically self-register to the web server API endpoint and pre-register its certificate.
monitor.exe install && monitor.exe start
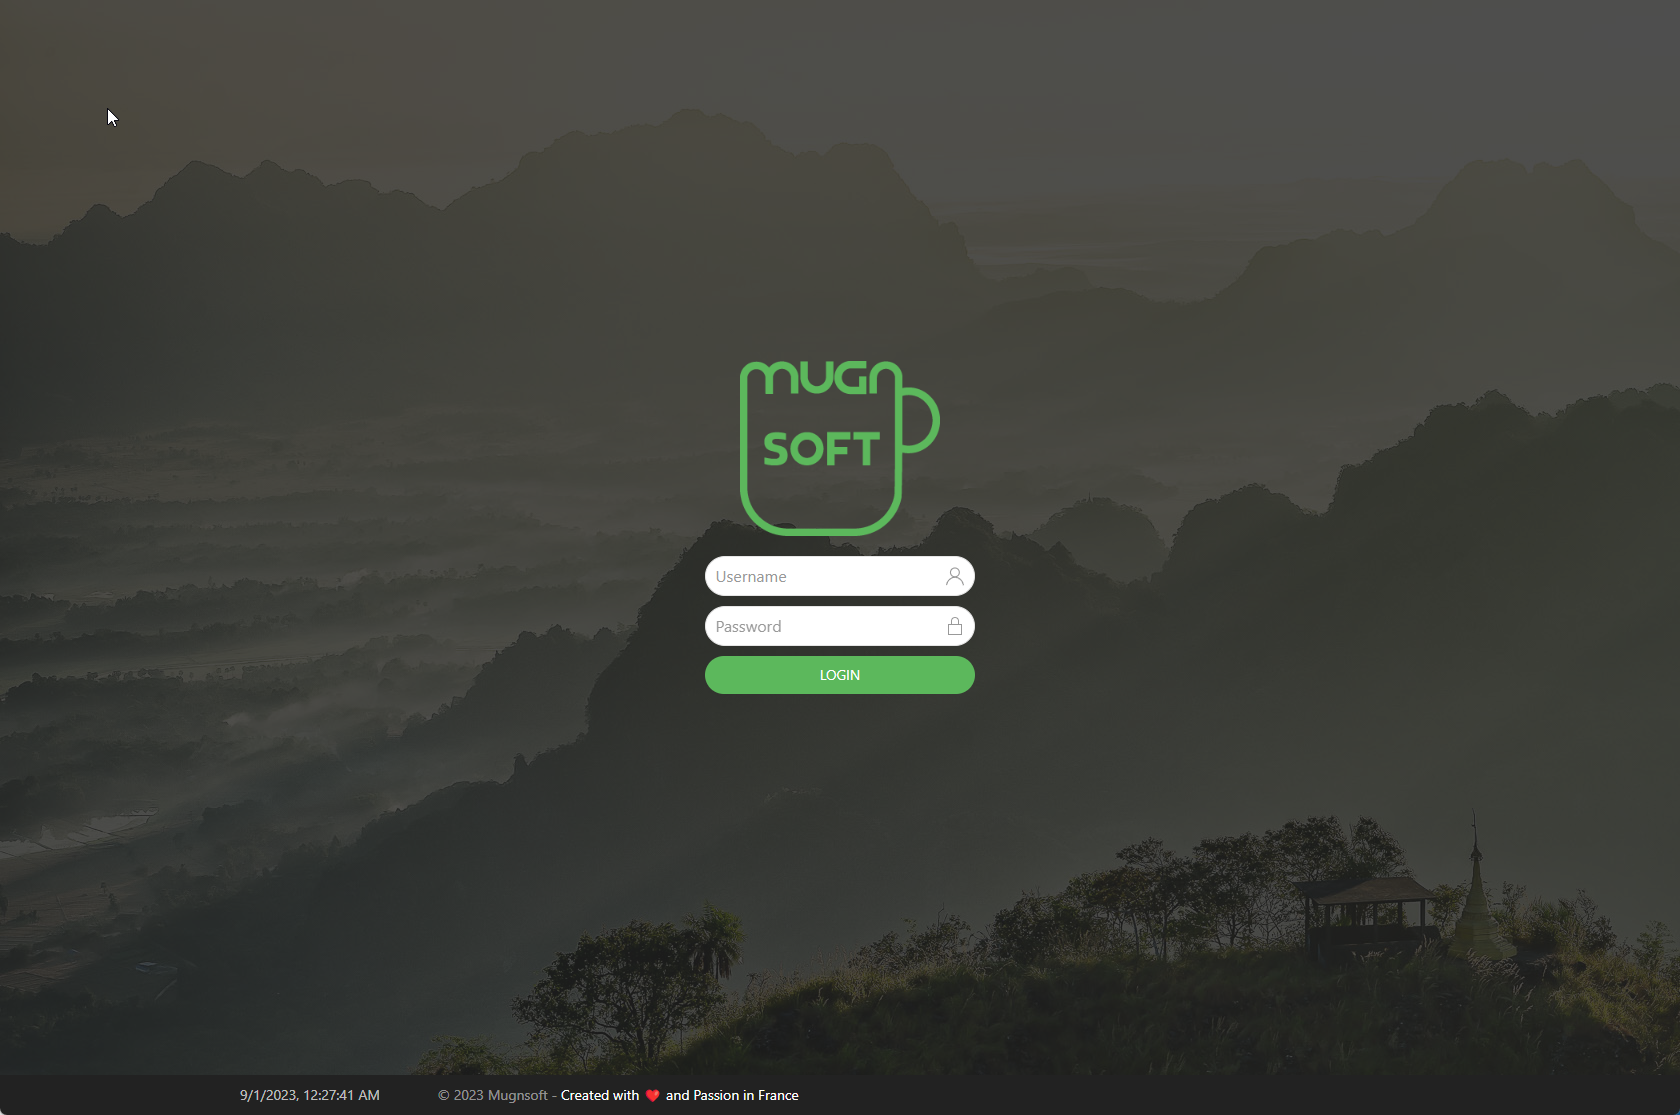
Open a browser at https://localhost:9090/ and log in using default user ‘admin’ and default password ‘admin’.
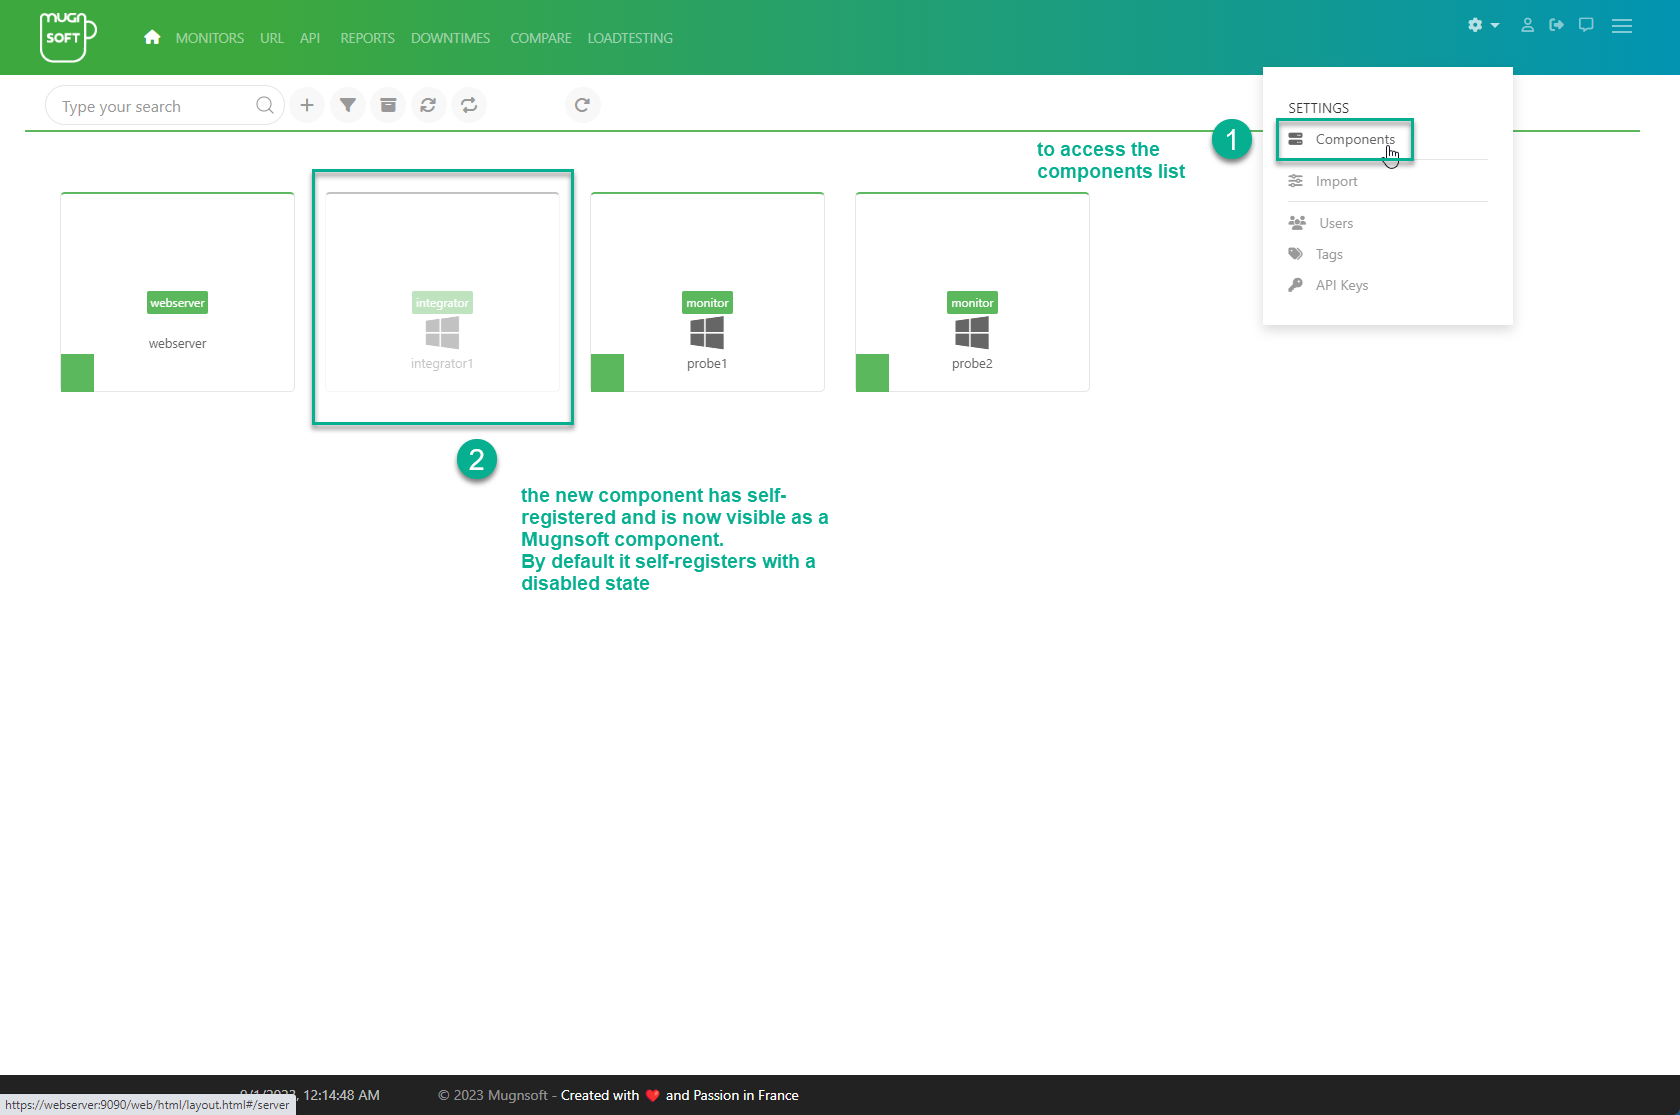
Once logged in enable the probe component
Go to the component web page:
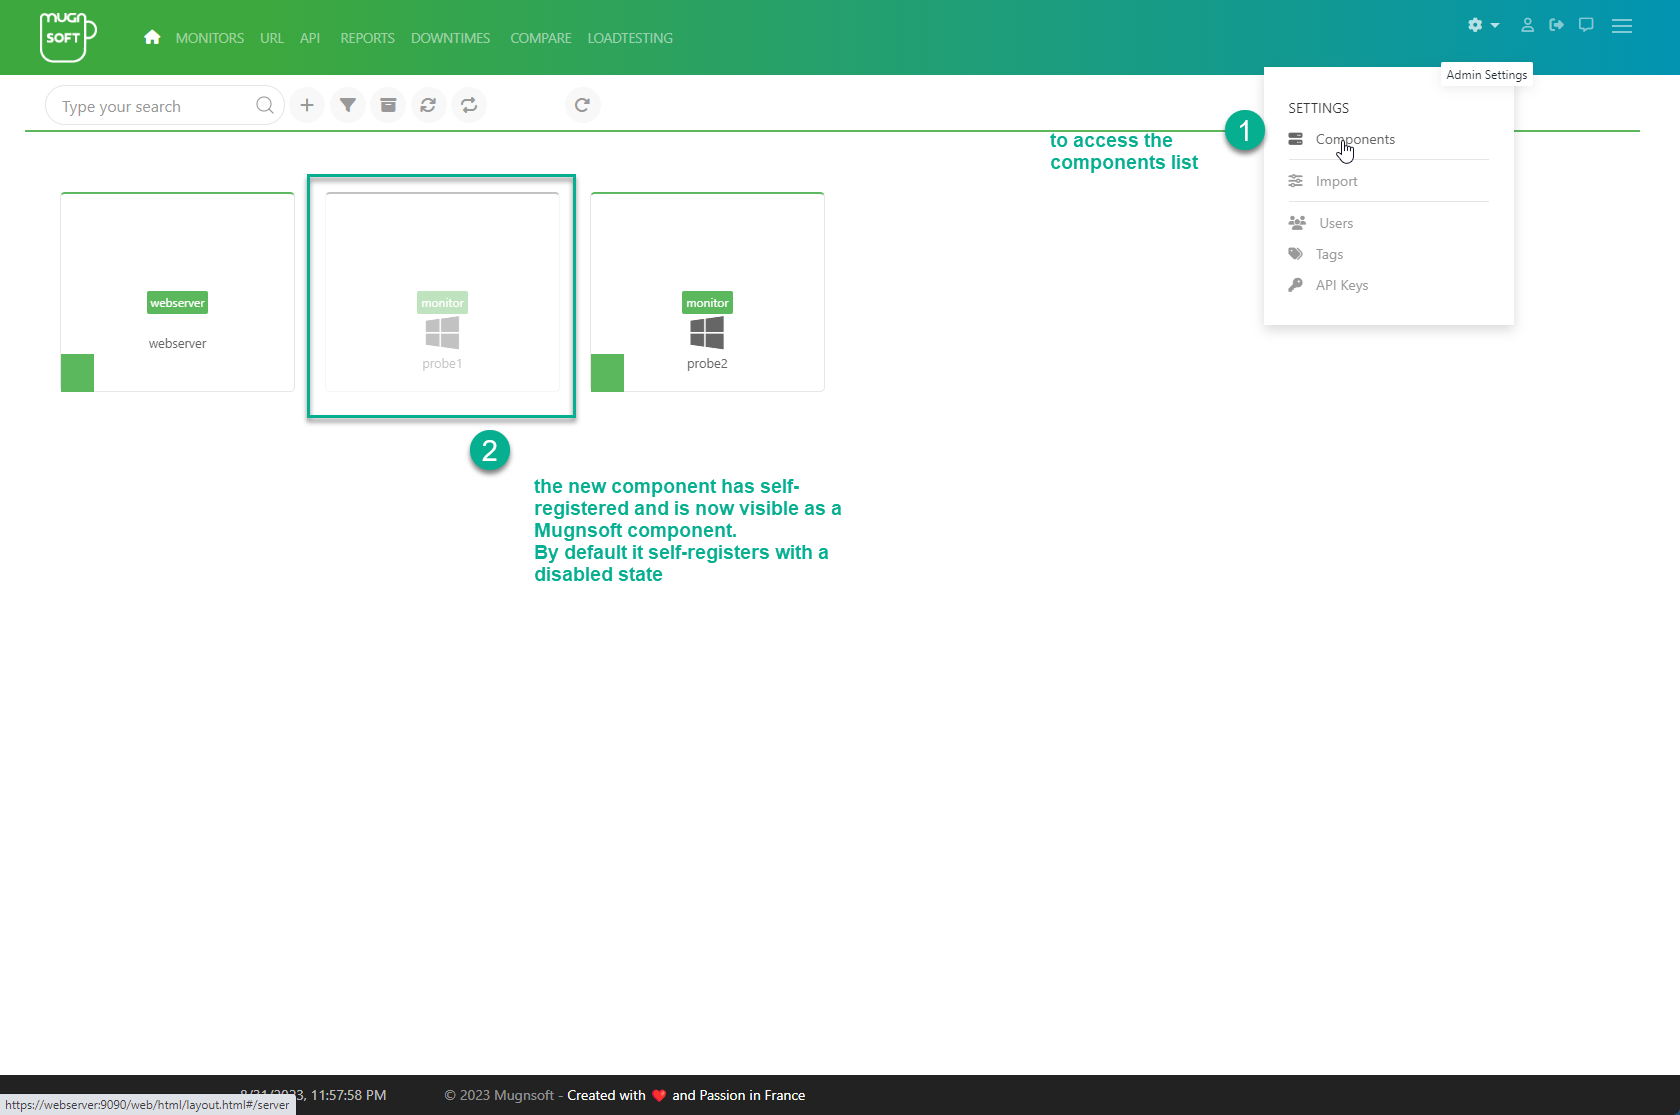
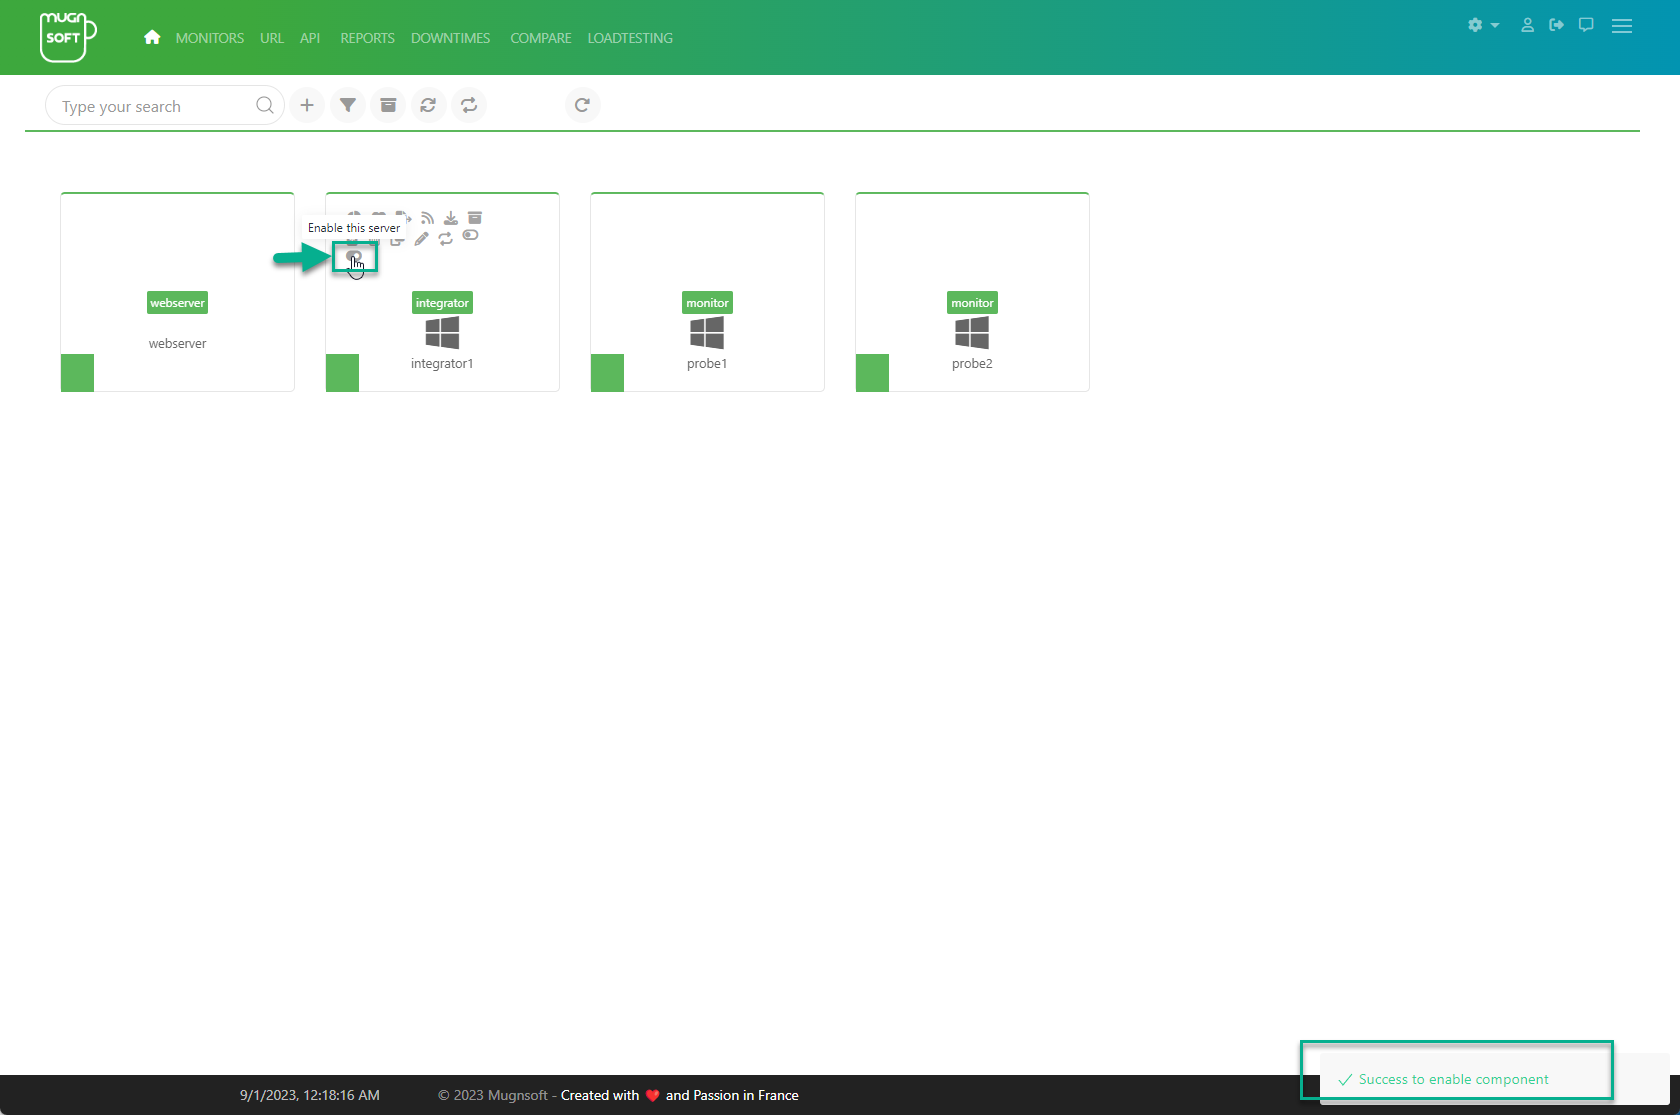
Enable the component through the Webserver component web page. Click on the “enable” button:

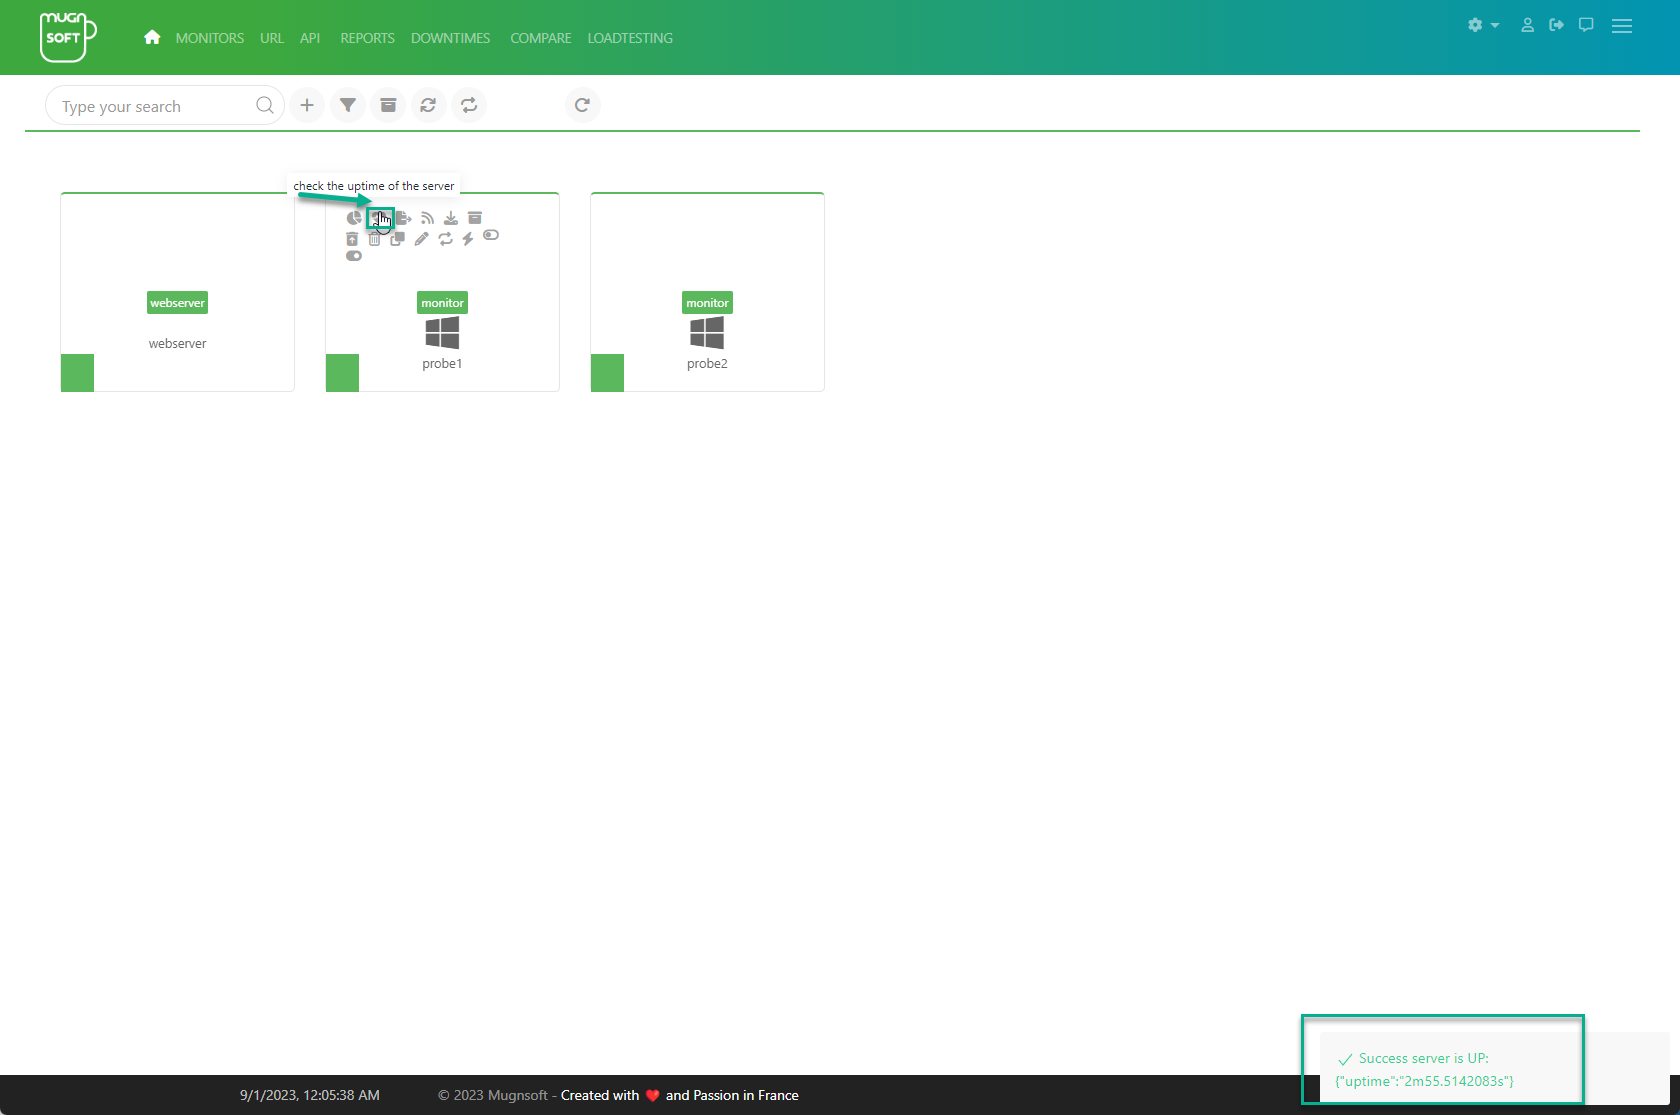
Check that the connection between the webserver and that monitor is fine by checking its uptime:
integrator
# download the zip file, unzip it and cd into it
unzip mugnsoft-integrator-<version>.windows-amd64.zip && cd integrator

# get the license file and copy it as "license_MNS.dat" (do not rename it) in the installation root directory

# proceed with the installation as a Windows service and start the service, open a DOS prompt. During this step, the integrator will automatically self-register to the web server API endpoint and pre-register its certificate.
integrator.exe install && integrator.exe start
Go to the component web page:
Enable the component through the Webserver component web page. Click on the “enable” button:
Check that the connection between the webserver and that integrator is fine by checking its uptime:

If you have time: detailed steps
Configure and Install Mugnsoft’s Webserver from .zip file on Windows (same applies for Linux)
# download the zip file by specifying the version you want from:
https://mugnsoft.com/bin/<version>/mugnsoft-webserver-<version>.windows-amd64.zip

# unzip the downloaded file and cd into it
unzip mugnsoft-webserver-<version>.windows-amd64.zip && cd webserver

# get a license file and copy it as "license_MNS.dat" (do not rename it) in the installation root directory
# (optional) update the API and WEB port in the webserver.json file (to optionnally change the port number)
notepad webserver.json

{
	"HTTPS": "true",
	"PortAPI": "8050",
	"PortWEB": "9090"
}

# proceed with the installation as a Windows service, open a DOS cmd:
webserver.exe install
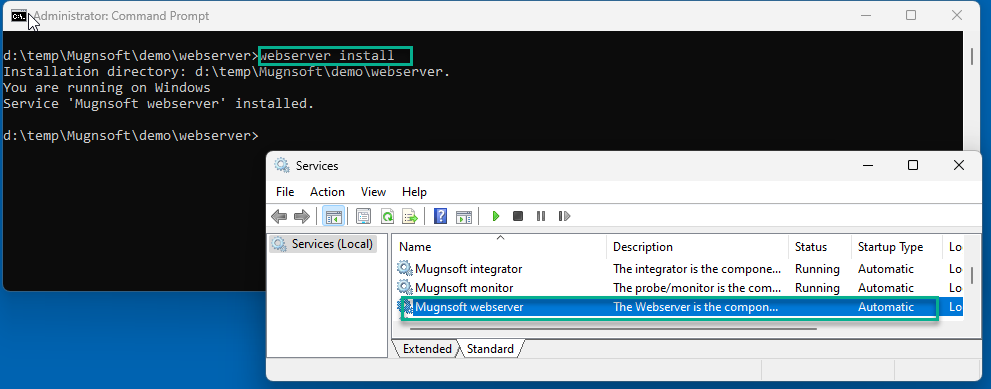
# start the service, open a DOS cmd:
webserver.exe start
Note:
At this stage, the service should be up and running.
You can now connect to the webserver’s web server: open your browser and go to (https://localhost:9090/ where 9090 is the port defined in your webserver.json file). The default admin user is ‘admin’ with password ‘admin’.
Configure and Install Mugnsoft’s Monitor from .zip file on Windows (same applies for Linux)
Now that the pre-requisite have been fullfilled, we can proceed with the same installation as the other components.
# download the zip file by specifying the version you want from:
https://mugnsoft.com/bin/<version>/mugnsoft-monitor-<version>.windows-amd64.zip
# unzip the downloaded file and cd into it
unzip mugnsoft-monitor-<version>.windows-amd64.zip && cd monitor
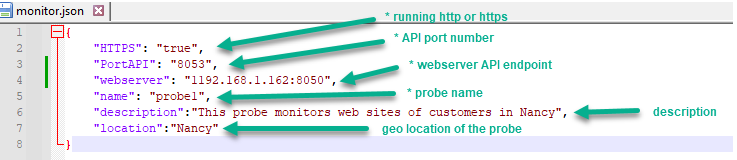
# update the API and WEB port in the monitor.json file
notepad monitor.json
{
"HTTPS": "true",
"PortAPI": "8051",
"webserver": "<webserver_ip>:8050",
"name": "probe1",
"description":"This probe monitors web sites of customers in Nancy",
"location":"Nancy"
}
=> here, just replace the <webserver_ip>
# proceed with the installation as a Windows service and start the service, open a DOS cmd:
monitor.exe install

Note: install without argument will use the default webserver api endpoint given in the monitor.json file
-
The monitor will automatically register itself on the webserver.
-
An auto-signed certificate will take place between the monitor and the webserver, to enable secure communication between them.

# proceed with the installation as a Windows service and start the service, open a DOS cmd:
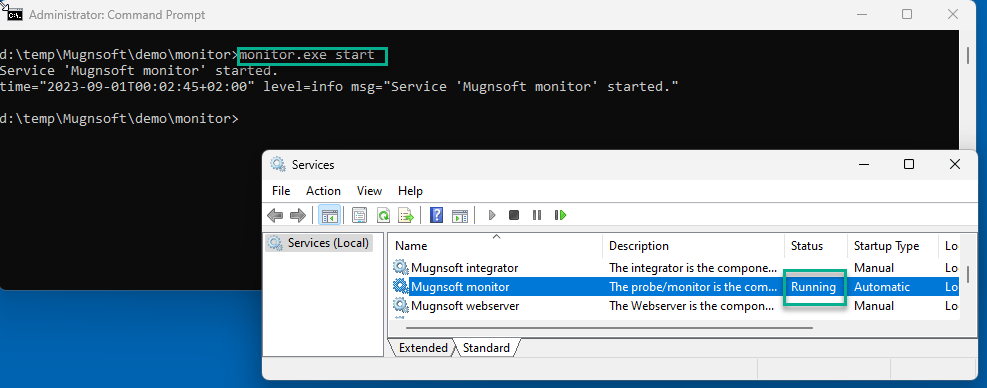
monitor.exe start
Note: install without argument will use the default webserver api endpoint given in the monitor.json file
Enable the component through the Webserver component web page. Click on the “enable” button:
Check that the connection between the webserver and that monitor is fine by checking its uptime:
Note:
Configure and Install Mugnsoft’s Integrator from .zip file on Windows (same applies for Linux)
# download the zip file by specifying the version you want from:
https://mugnsoft.com/bin/<version>/mugnsoft-integrator-<version>.windows-amd64.zip

# unzip the downloaded file and cd into it
unzip mugnsoft-integrator-<version>.windows-amd64.zip && cd integrator

# get the license file and copy it as "license_MNS.dat" (do not rename it) in the installation root directory

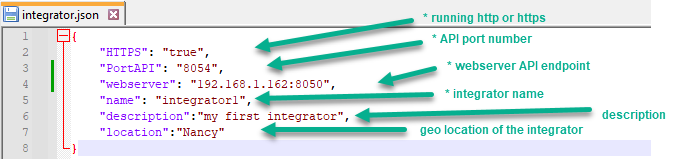
# open the integrator.json file
notepad integrator.json

{
	"HTTPS": "true",
	"port": "8052",
	"webserver": "<webserver_ip>:8050",
	"name": "integrator1",
	"description":"my first integrator",
	"location":"Paris"
}

=> here, just replace the <webserver_ip>
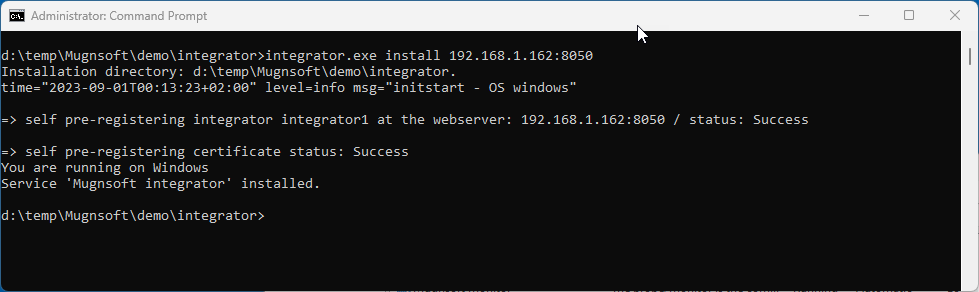
# proceed with the installation as a Windows service, open a DOS cmd:
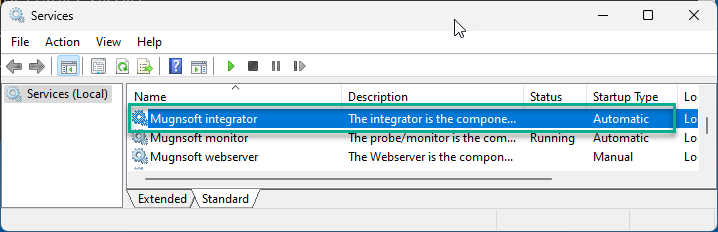
integrator.exe install
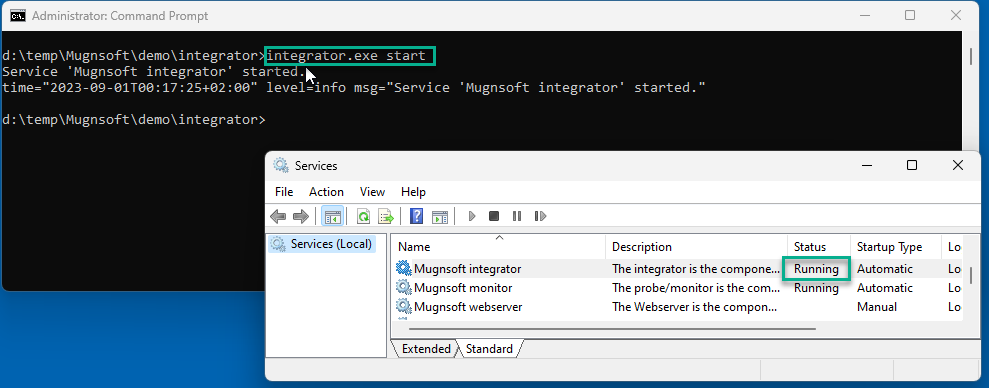
# proceed with the installation as a Windows service and start the service, open a DOS cmd:
integrator.exe start

Note: install without argument will use the default webserver api endpoint given in the integrator.json file
Enable the component through the Webserver component web page. Click on the “enable” button:
Check that the connection between the webserver and that integrator is fine by checking its uptime: